PNM image format is an abstraction of the PPM, PGM and PBM formats, which means that PNM refers collectively to PPM, PGM and PPM image formats. PNM stands for “Portable aNyMap format”, where “aNyMap” is “PixMap” for “PPM (Portable PixMap format)”, “GrayMap” for “PGM (Portable GrayMap format)” and “BitMap” for “PBM(Portable BitMap format)”. There are four extension names for PNM image files: ppm, pgm, pbm and pnm.
The coming words will guide you in converting a document of html to pnm image, using the VeryPDF HTML Converter Command Line. The commands needed to be typed into your MS-DOS command prompt window are as below:
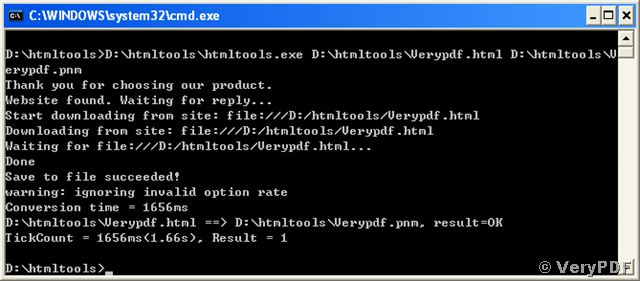
D:\htmltools\htmltools.exe D:\htmltools\Verypdf.html D:\htmltools\Verypdf.pnm <Enter>.
“D:\htmltools\htmltools.exe” is telling the command prompt to launch the conversion tool and “D:\htmltools\Verypdf.html” indicates the file path and name of the source html document. The target file path, name and extension name are specified in “D:\htmltools\Verypdf.pnm”.
The command prompt process is as shown in the screen snapshot:
Presently, the conversion tool VeryPDF HTML Converter Command Lineonly supports to convert html to pnm stored in extension name of “pnm”. If you want to use other three extension names for your converted image from html to pnm, you can use the image editor application GIMP to achieve your aim.
Here are the guides in detail:
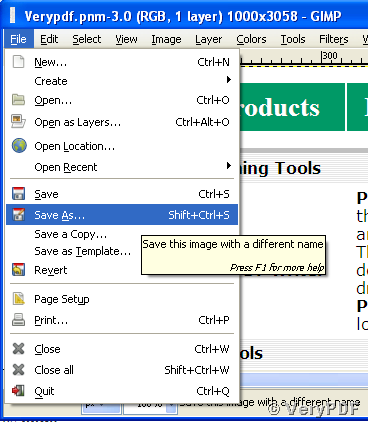
Firstly, open your converted image converted from html to pnm with the application GIMP. Then follow the guides:
1, for saving image converted from html to pnm as ppm:
Step 1.1, select “Save As…” in the “File” menu of GIMP
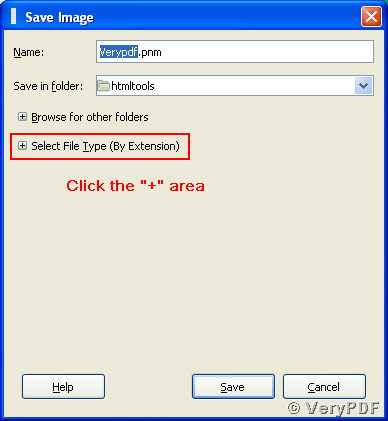
Step 1.2, click the “+” area of “Select File Type (By Extension)”
Step 1.3, scroll to the extension name of ppm, “PPM image”, and press the “Save” button
Step 1.4, press the “Save” button in the popup window ignoring the “Data formatting” options
Then a new image with name “Verypdf.ppm” for this case will be created in your current directory.


2, for saving image converted from html to pnm as pgm:
Step 2.1 (take the same operations as Step 1.1)
Step 2.2 (take the same operations as Step 1.2)
Step 2.3, scroll to “PGM image” and press “Save”
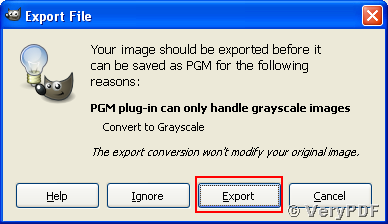
Step 2.4, press “Export” in the warning popup window with message “PMG plug-in can only handle grayscale images”
Step 2.5 (taking the same operations as Step 1.4)
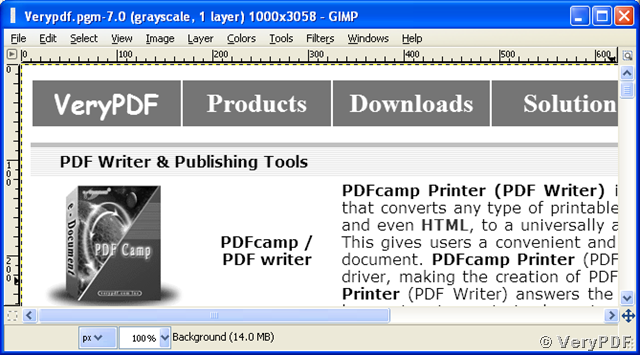
Then a new graymap image is created with losing the colors and stored in grayscale as shown:

3, for saving image converted from html to pnm as pbm:
The steps are similar to those of saving as pgm. The only difference is choosing the pbm instead of pgm at Step 3.