EPI,which is short for EclipsePackager Invoice, is known as an extension name of file type.EPI files are used to separate large files into smaller segments for distribution over the Internet, email, or other external media,which is also an ideal way for storage to media with limited capacity like ZIP or floppy disks. The file extension .epi supports the program's wizard based interface along with data recovery, compression, and the Green Eclipse Intelligent Packing Technology.
If you want to print epi to pdf files,there is a ideal software to use. The software is named as PDFcamp Printer which can print any type of printable files to pdf files.It is also cheap and easy to learn.
Now this article will introduce you some steps to print epi to pdf.
First,open an epi file in your computer by IrfanView or some other software.Then you can run the printer driver by clicking “file” – “print” or pressing “Ctrl” + “P”. Please look at figure1.
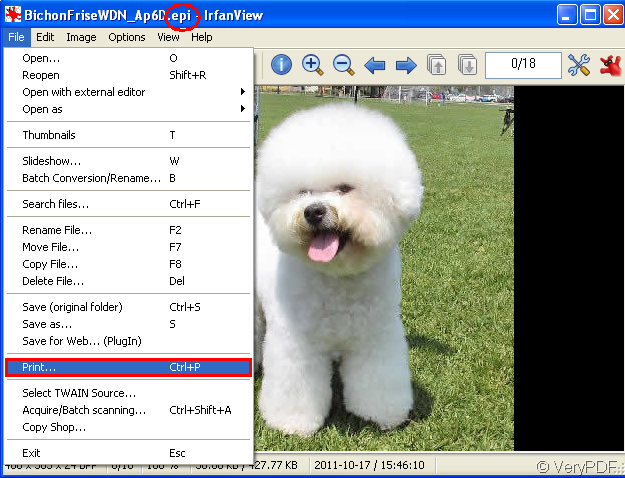
figure1.
Second,in the “print preview” dialog box,you can choose the current printer as PDFcamp Printer in “printer” combo box.In “print” group box,you can set the size of the file by the size supplied of just the custom size.You also can set headnote and footnote of the file.Click “printer setup” button to enter into “print setup” dialog box and set the parameters of PDFcamp Printer by clicking “properties”.Look at figure2.Then you can click “OK” and “print”.

figure2.
Third,save and name your file in “save as ”dialog box.Then click “save”.
At last,you will see a new created pdf file after printing epi to pdf file by PDFcamp Printer.Look at figure3.
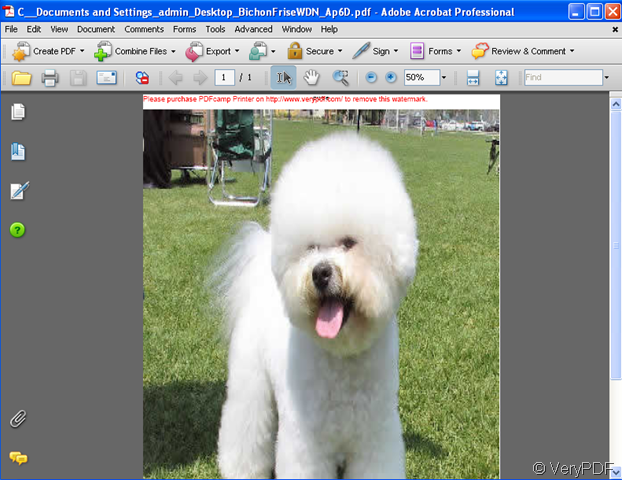
figure3.