Microsoft has defined a particular representation of color bitmaps of different color depths, as an aid to exchanging bitmaps between devices and applications with a variety of internal representations. That is bmp file format. If you have the need to convert the word to bmp file, please read this article.
I convert the word to bmp file by software docPrint which can convert nearly all the printable file formats to all kind of image formats. Such as BMP, DCX, EMF, WMF, GIF, JPG, MNG, PBM, PCD, PCX, PGM, PIC, PSD, PNG, PNM, PPM, TGA, TIFF, AVS, JBG, JP2, PDF, PS, EPS, WBMP, XBMP, XPM, etc. files; Then I will show you how to use software docPrint to do the converting from word to bmp.
- Have a visit for docPrint.
We can deny the function of docPrint during the conversion, so we should visit its homepage to know to use it and use its other features which would be very helpful for your future use. There is the free version to have a try by yourself. If you feel it is good, you can buy it then. This is its homepage link: https://www.verypdf.com/artprint/index.html
- Add your word file to docPrint
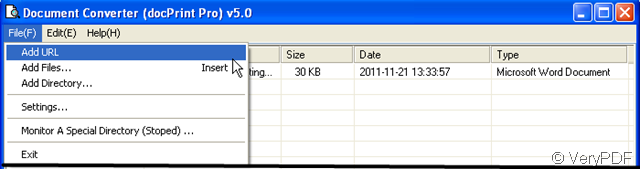
The icon of docPrint which looks like a magnifier will be shown on the desktop automatically after downloading. Double it then you will enter its interface. Drag your file from its containing folder is OK or you can click the button “Add File” to choose the folder then add your word document. If you want to convert the word document on fly, you do not need to download it, Click the button “File” on the top then go to file URL part to input the file detail website location, and then you can convert it to bmp on the internet. Please see the detail operation in this picture for this function.
- Set limitations for your bmp file.
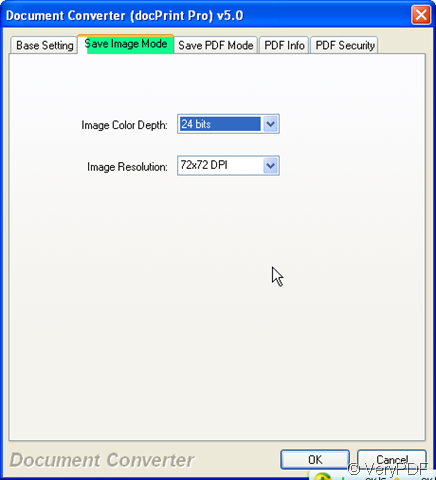
As we need to convert word to bmp, we should choose the target file format by clicking setting menu. Then in the first sub menu label “Base setting” you will find the output format, choose the bmp there. If you need to set the color depth and color resolution for bmp file then go to save mode label, you can set them on this menu label. If you have finished the setting, please click the button “OK” to end the setting.
- End conversion.
The last step is clicking the button “start” to end the conversion. If you do no set the folder in advance, you have to set it here. A few second later, you will see the bmp file show up in the appointed folder. .