Color depth refers to the number of bits of each pixel which is used to present color in an image in your computer. Color depth can range from 1 bit (black and white) to 32 bits (28 colors). The higher the color depth, the more exquisite and clearer the image is in your computer. You can employ VeryPDF HTML to set color depth and convert HTML to JP2 via command line in a very easy and convenient way. The conversion from HTML to JP2 will take only one or two seconds. VeryPDF HTML Converter Command Line is available at the following website: https://www.verypdf.com/htmltools/index.html#dl
The command for color depth setting is -bitcount <int>, which you are bound to put in the command line. The following will take three steps to introduce the way to set color depth and convert HTML to JP2 though one command line.
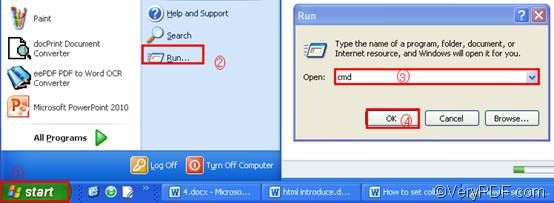
1. Run the command prompt window
The following is the most popular way to open the command prompt window. You should click “Start” in the left down corner of the desktop; > click “Run” on the home menu; > enter “cmd” in the “Run” dialog box that pops out;>click on “OK” in the “Run” dialog box. Then the black and white command prompt window will appear on the computer screen.
2. Enter a command line
For color depth setting and HTML to JP2 conversion, the command line should be composed of four factors: the executable file, the command for color depth setting and the input and output files. Look at the following pattern, which clear illustrates what should be included in a command line:
htmltools -bitcount <int> <EMF file> <JP2 file>
- htmltools refers to the executable file htmltools.exe, which is placed in the folder htmltools by default after the install file is decompressed.
- -bitcount <int> is the command which can be used to set color depth. The angle brackets enclose the essential content, which is int here. int means integer, so the number following -bitcount must be an integer. For this command, it allows three parameter values: 1, 8 and 24. As the color depth comes to be higher, the number of colors in the image increases.
- <EMF file> refers to the input file in EMF format.
- <JP2 file> denotes to the output file in JP2 format.
Now that you know what should be included in a command, you can enter a command line in the command prompt window. What you need to take an attention is that you should enter the whole directories of the files rather than the bare names in the command prompt window. The following illustration may help you better understand how to enter a command line with full directories of files.
E:\htmltools\htmltools.exe -bitcount 8 D:\in\pink.emf C:\out\pink.jp2
- E:\htmltools\htmltools.exe is the directory of the executable file htmltools.exe. The directory shows that the folder containing the executable file is on disc E. You can change the directory, according to the place where the executable file is stored.
- -bitcount 8 is the command specifying 8-bit as the color depth for the output JP2 file. Hence the output image will be capable of containing 256 colors. 8 can be placed by 24 or 1, depending on your requirements.
- D:\in\pink.emf denotes the directory of the input EMF file, leading the computer to find the input file pink in the folder in on disk D. Again, it can be replaced, according to the file you select.
- C:\out\pink.jp2 represents the directory of the output file, showing that the output format must be JP2, the name should be pink, and it should be placed in the folder out on disk C.
3. Press “Enter”
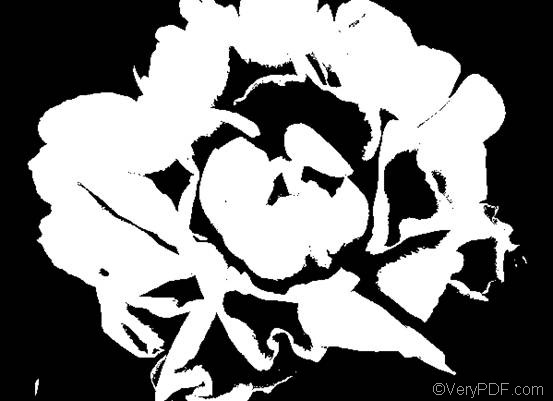
Press the “Enter” key, and the HTML converter will convert HTML to JP2 in a wink. You can view the effect of the output files right away. The images below are the original EMF file, and the files converted from HTML to JP2 in different color depth.
The original EMF file

1-bit JP2 file
8-bit JP2 file
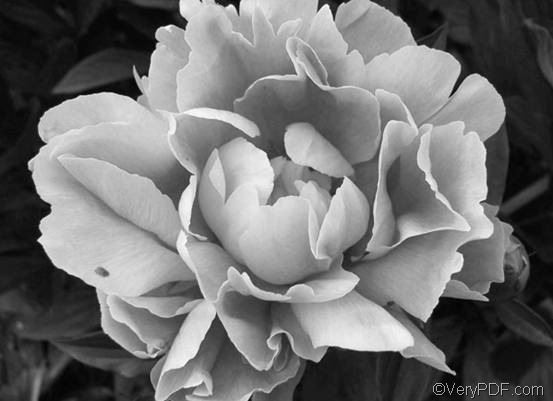
24-bit JP2 file

![]()