Please don’t consider converting ppt to miff as a difficult task that you cannot accomplish. If you have docPrint on your computer, you can do it easily and quickly.
docPrint is a Windows printer driver that saves ink, paper and time by controlling printed output. It supports to print 2, 4, 6, 8 or 16 pages on a single sheet of paper. It also supports to scale A0, A1, A2, A3 papers to standard Letter or A4 paper sizes.
docPrint is also a document converter. it can convert any printable document to 50+ graphics, it may be a Microsoft Word file, Adobe PDF file, HTML file, Excel file and others. docPrint supports various image formats, resolutions and compressions.
docPrint is easy-to-use, just print a document to docPrint, you will be able to start using document printer software.
In fact, docPrint is one application of a professional document converter—docPrint Document Converter Professional. To use docPrint, you should download docPrint Document Converter Professional at https://www.verypdf.com/artprint/docprint_pro_setup.exe first and install it on the computer. In the end of the installation, you will be reminded whether to set docPrint as default printer. It is up to your need.
The contents below are the steps to convert ppt to miff for your reference.
You should run the printer driver first. Please open a PPT document and click “File”—“Print” to open “Print” dialog box in which you should choose “docPrint” as current printer in “Printer” dialog box and click “Save” button. If you don’t like this way, please press “Ctrl”+ “P” on the keyboard at the same time. If docPrint is the default print, some useless operations can be skipped. You just need to right click the PPT document and choose “Print” option to run docPrint directly.
Then you will see “docPrint” dialog box showed in Figure1, in which you can see several function icons and a small dialog box on the right. Please don’t care about them if you want to convert ppt to miff only. Just open “Save As” dialog box with the methods offered. You can click “File” and click “Save as” in dropdown list. The icon which looks like a floppy disk in the toolbar is a good idea. You can also use the hot key “Ctrl”+ “S” to save files.
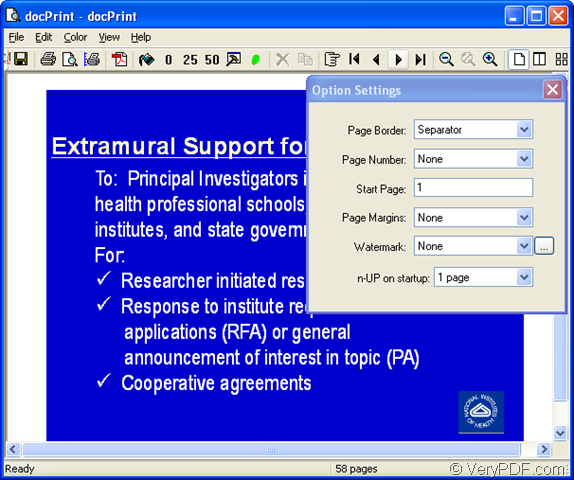
Figure1.
The last step in the conversion from ppt to miff is saving target files in “Save As” dialog box which is showed in Figure2. In “Save in” combo box, you can choose a location for all target files. In “File name” edit box, please input the name for output files. In “Save as type” combo box, you should select the file type for output files from many choices. Then please click “Save” button.
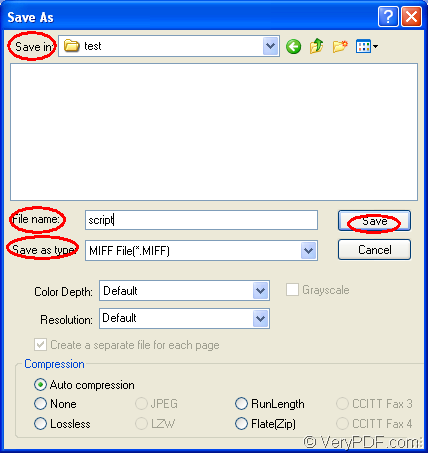
Figure2.
The conversion from ppt to miff comes to the end if you have finished the operations above. As you see, the process is easy enough and you can do it well even without the help of this article.
If you want to get more functions or information about docPrint, you can visit the website: https://www.verypdf.com/artprint/index.html.