Mini EMF Printer Driver is a kind of application programming interface (API) which is designed for software developers to develop their own software. It supplies virtual printer and interface which can be called by third party applications. With Mini EMF Printer Driver, you can print any printable documents to image formats such as image to emf. In this article, you will see how to convert bmp to emf.
For free trial this API, you can click here to download it. In the installation process, you will be asked whether to set the virtual printer VeryPDF Demo EMF Printer as the default printer. For the convenience of your work, you are recommended to choose “Yes”. In the printer list, you will see the new added virtual printer after the installation with the default name VeryPDF Demo EMF Printer. If you need, you can change it as another name for your use by right clicking the printer and choosing “Rename”. Then you can call it freely according to your needs.
If you want to buy a developer license, you can click the following link: https://www.verypdf.com/order_miniemfprinter.html. When you get the license, you can use the API develop or distribute your own applications and you can also redistribute the related components about Mini EMF Printer Driver in your applications without further user fees.
If you want to convert image to emf, you can use the virtual printer VeryPDF Demo EMF Printer installed on your computer because it is an easy-to-use application which enables you to convert image to emf such as bmp to emf within only one step. You just need to print the image to the printer.
For example, you can open the BMP format image with some kind of image viewing program. Then you can use the hot key “Ctrl”+ “P” to open the “Photo Printing Wizard” dialog box in which you should choose the image you want to convert and click “Next” button. You need to choose the current printer as “VeryPDF Demo EMF Printer ” in next dialog box in the combo box and click “Next”. Please see it in Figure1. In the following dialog box, you should choose the output layout and click “Next” button. Then the conversion will start and you need to wait for several seconds.
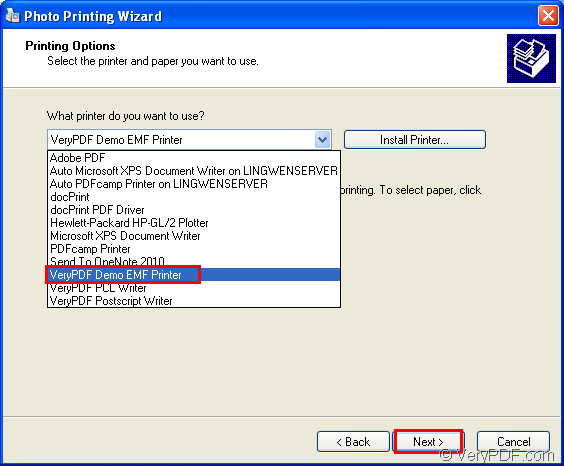
Figure1.
Then the target EMF file will popup and the conversion from image to emf is over. If you want to get the output directory of the target file, please find it in “C:\” which is the default output location of the virtual printer VeryPDF Demo EMF Printer. If you want to change the default location, please find the directory “C:\Program Files\VeryPDF Mini EMF Printer v2.0\emf_printer_driver\option.ini” and change “C:\” as the new one in “OutputFile= New Directory”.