For the purpose of converting OpenOffice document of odt to pbm, you can take the application docPrint Document Converter Professional which is also called as docPrint Pro for short as your tool. It is useful in document converting for it powerful functions.
docPrint Pro is a professional document converter which is able to convert any printable documents such as MS Word, Excel. PowerPoint, OpenOffice, etc. to various image formats such as JPG, BMP, TIFF, GIF, PNG, PNM, PBM, etc. Just with docPrint Pro, you can realize your conversion process only by some easy clicks.
There are three available applications in docPrint Pro, which are GUI application, command line application and virtual printer application. You can choose anyone according to your needs. For example, if you want to convert documents to images in batch, you can choose the GUI application; If you are a software developer, you may need the command line application as your helper; If you want to save paper and ink, please choose the virtual printer application.
In addition, the virtual printer can also plays the role as a document converter. When you print the printable documents to the virtual printer docPrint, you will find there is a friendly interface appearing on the screen, which is easy to use and master. If you want to use docPrint, please download docPrint Pro at the website: https://www.verypdf.com/artprint/docprint_pro_setup.exe for free and install it on your disk.
1. Run the printer driver.
Please open an ODT document in OpenOffice program and click “File”—“Print” to open the “Print” dialog box in which you can choose “docPrint” as your current printer in “Printer” combo box. Then please click on “Print” button. If you use the hot key “Ctrl”+ “P”, the “Print” dialog box will be opened too. If you have set docPrint as your default printer, you just need right click on the ODT document and click “Print” option to run docPrint directly instead of opening the document.
2. Open “Save As” dialog box.
In the popup “docPrint” window on your screen, you are able to see some function buttons in the toolbar and a small dialog box on the right. Please click “File”—“Save as” or click the “Save File” button in the toolbar to open the “Save As” dialog box in which you can make changes to the target file and run the conversion from odt to pbm. You can also use the combination “Ctrl”+ “S” on the keyboard to open “Save As” dialog box.
3. Save the target file.
In “Save As” dialog box, please see it in Figure1, you can save your target file. In “Save in” combo box, please choose a location for the target file. In “File name” edit box, you should input the name for the target file. In “Save as type” combo box, the right output format can be chosen. Then please click on “OK” button to save all the changes.
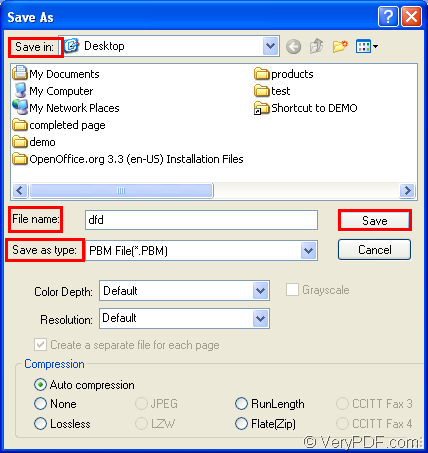
Figure1.
After you click on “Save” button, the conversion from odt to pbm will run and the target file will be created later. Please check your target file in the specified location seconds later. If you want to learn more functions about docPrint Pro, please click here to visit its homepage.