html converter (htmltools)

How to convert html to jpg format?

Sometimes you want to save the whole webpage in your computer so that you can browse it at any time no matter there is Internet or not.But how to and what kind of tools we can use?

Don’t worry,HTML Converter Command Line can help you.It allows you to convert web pages to PDF, PS (postscript), WMF,JPG, EMF vector formats.HTML Converter Command Line also allows you to create previews or thumbnails of web pages in a number of different formats, such as TIF, TIFF, JPG, JPEG, GIF, PNG, BMP, PCX, TGA, JP2 (JPEG2000), PNM, etc.

After using HTML Converter Command Line,you will find how convenient and easy it is only by some command lines.

This article will introduce to you how to convert html to jpg format with HTML Converter Command Line.You can learn step by step.
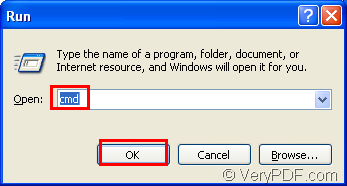
Step1.Run cmd.exe

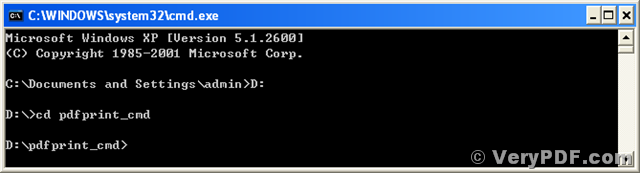
Click “start” and click “run” in start menu.Then input “cmd” in “open” edit box and click “OK” button.Please look at figure1.
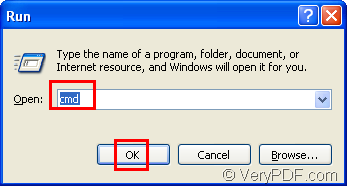
image

                                     figure1.

Step2.Input commands

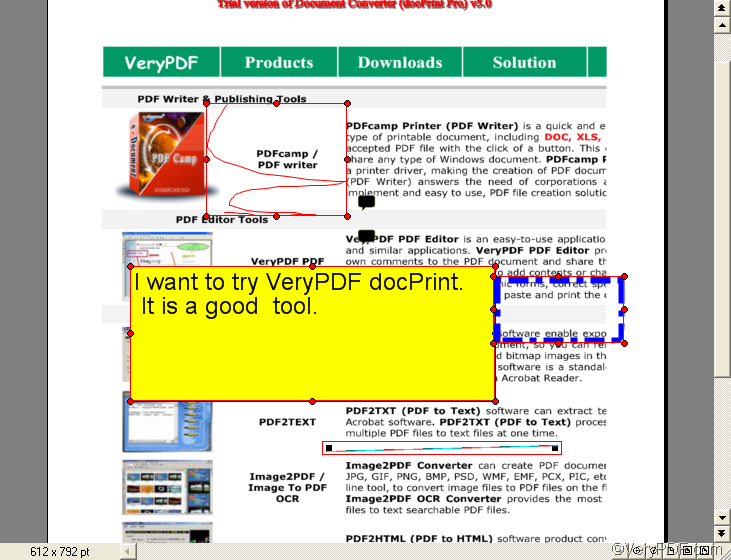
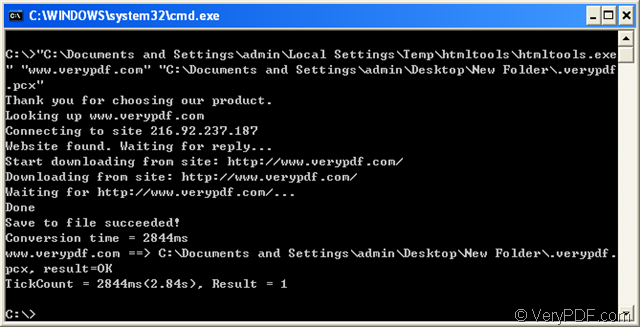
You should input the commands in cmd.exe dialog box to run the conversion of html to jpg.The commands should contain the called program,source file and target file.Please look at figure2.

image

                                                                           figure2.

The commands are "C:\Documents and Settings\admin\Local Settings\Temp\htmltools\htmltools.exe" "www.verypdf.com" verypdf.jpg.

"C:\Documents and Settings\admin\Local Settings\Temp\htmltools\htmltools.exe"   is the directory of htmltools.exe which is the executable file in HTML Converter Command Line.

“www.verypdf.com  is the URL of webpage.

verypdf.jpg  is the name of target file.

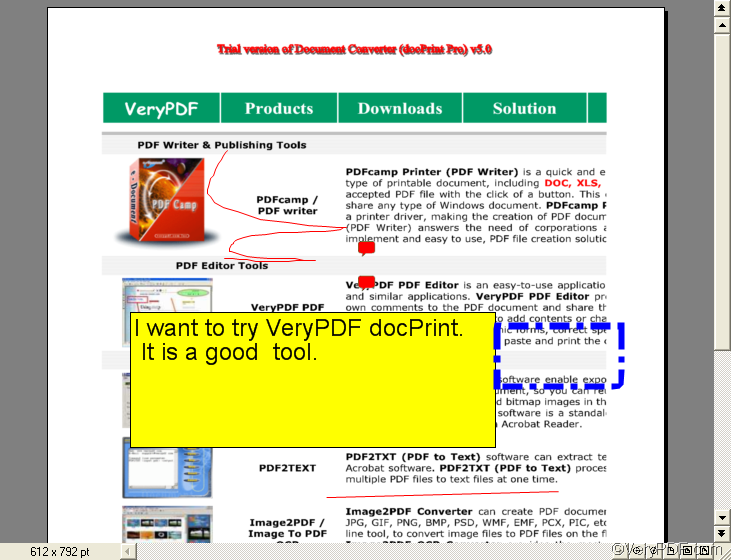
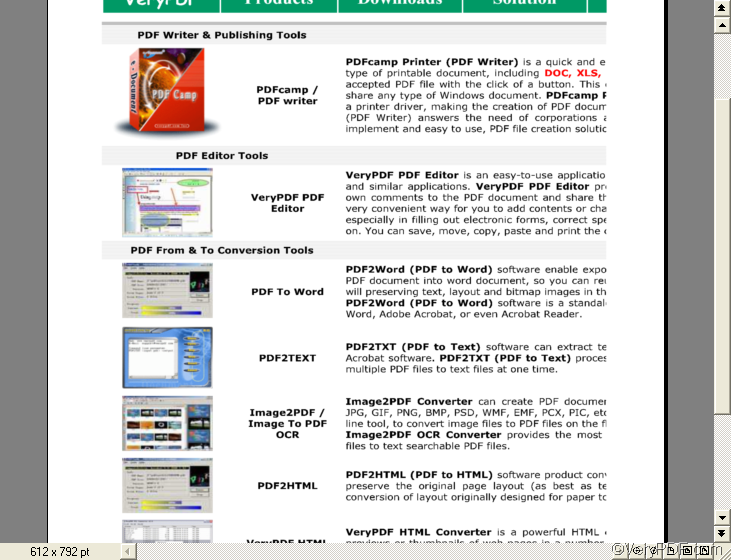
Then you will find the jpg file in current directory—C disk where the target file will be saved in by default if there is no specifying of output directory.Please look at figure3.
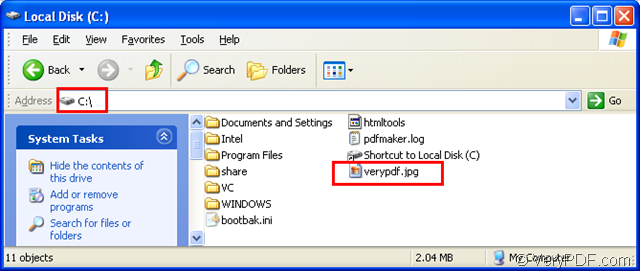
image

                                                                            figure3.

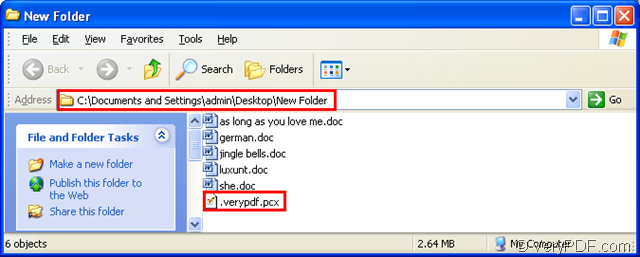
If the commands are "C:\Documents and Settings\admin\Local Settings\Temp\htmltools\htmltools.exe" "www.verypdf.com" “C:\Documents and Settings\admin\Desktop\New Folder\verypdf.jpg”,the target file will be saved in C:\Documents and Settings\admin\Desktop\New Folder.

Of course,when converting html to jpg,you can specify the directory of output file yourself.

VN:F [1.9.20_1166]
Rating: 0.0/10 (0 votes cast)
VN:F [1.9.20_1166]
Rating: 0 (from 0 votes)
docprint pro

How to make properties default when edit comment in docPrint preview application?

VeryPDF docPrint supports you to add comment, edit comment, and  change the properties of comment on current page in docPrint preview application. docPrint preview application is one of the application of VeryPDF docPrint . VeryPDF docPrint is not only a printer driver, which allow you to preview with editing capability, Easily add blank pages, delete pages, and re-sequence jobs; but a document converter, which converts any printable document to 50+ graphics. This article will show you only a little part of the print preview function of VeryPDF docPrint: how to make properties default of comment by default.

When you add and edit comment on current page, you may want to save the properties you have set, so then the newly added comment will with the original properties as the same as the the saved one. In this article. I would like to take text comment as an example to show you how to make properties of text comment default in the docPrint preview application.

As illustrated on the following page in the Annotate Document dialog box, the text comment is of the original properties.

image

Now, let’s change the properties of the text comment. You can right click the text comment, and select Properties on the menu to open the Properties dialog box. We click the Fill Color check box, set pink as the fill color, and set 20 as the Font Size. Then click Close to close the box.  We also drag the text comment to the proper size, then we got the text comment with new properties on current page.

image 

image

Then to make properties default, you should right click the text comment, and choose Make Properties Default on the menu.

image

After that, when you add a new text comment, the original properties of the newly added text comment will be the same as the saved one. You can evaluate the effect of the function on the following screenshot: The one marked by an arrow an is the newly added text comment. As you can see, it has the same fill color, font color and font size as the former one.

image

VN:F [1.9.20_1166]
Rating: 0.0/10 (0 votes cast)
VN:F [1.9.20_1166]
Rating: 0 (from 0 votes)
pdf print

Print splines in pdf documents using a command line

Batch printing pdf documents always needs an application that supports running under MS-DOS mode which is appropriate for batch script calling. VeryPDF PDFPrint is the program that supports to print pdf documents in a command line. This software can set almost all of the options of a physical printer. For some old printers, it is not supported to print those complex vector patterns, such as splines, in a pdf document. VeryPDF PDFPrint is able to convert the pdf pages to images before printing them, which will resolve the problem of printing complex vector patterns using old printers.

This url is for downloading VeryPDF PDFPrint, https://www.verypdf.com/pdfprint/index.html#dl. The program is packed in a zip package with other resources, and you have to unpack the pack into any chosen directory in your computer. The author uses the directory of “D:\pdfprint_cmd” for easy describing in this article. In the directory where you unpack the package, you will find an executable program named “pdfprint.exe” that is for running in MS-DOS mode.

Before running the program in command lines, you need to start your Microsoft DOS command prompt in your system. Follow the menu path and operations will open the MS-DOS command prompt window. [start] –> [Run…], input “cmd” or “cmd.exe” into the input box of the popup dialog of “Run” and press “OK”. Then the MS-DOS command prompt window will come out.

The default current path of the MS-DOS command prompt is “C:\Documents and Settings\user”, in which the “user” stands for your logon name of the system. In the current path, you have to call the program with specifying the full path of PDFPrint, for which the command line is that as follow.

D:\pdfprint_cmd\pdfprint.exe D:\pdfprint_cmd\readme.pdf <Enter>,

this command line calls the program of “pdfprint.exe” in “D:\pdfprint_cmd\” and prints the pdf document of “readme.pdf” stored in “D:\pdfprint_cmd\”. For easy using, you can change the current directory of the MS-DOS command prompt to the one that the program of PDFPrint is unpacked into. The following commands will change the current directory from “C:\Documents and Settings\admin” to “D:\pdfprint_cmd” for this article.

D: <Enter>
cd pdfprint_cmd <Enter>

After changing the current directory of MS-DOS command prompt, the program of “pdfprint.exe” is able to be called directly with its name without its long full path. The following screen snapshot shows that the current directory is now changed into “D:\pdfprint_cmd”.

image

Now you can call the program with its name without long full path in a command line. A simple usage of PDFPrint is printing a pdf document with the system default printer and settings using the command line like the following one,

pdfprint readme.pdf <Enter>.

There are many options for setting the printing and “-raster” is one of them. Option “-raster” is for converting the pdf pages into images before printing them for avoiding compatibility problems of printing complex vector patterns with old printers. The usage of the option is demoed in the next command line.

pdfprint –raster readme.pdf <Enter>,

where the option “-raster” will enable the function of converting the pdf pages before sending them into the printing spool. This option is useful for avoiding encountering problems in printing unsupported patterns using old printers.

There are more articles for describing the usages of VeryPDF PDFPrint at https://www.verypdf.com/wordpress/category/pdf-print. The user manual of PDFPrint is provided at https://www.verypdf.com/pdfprint/pdf-print-cmd.html. If you want to use the official version of PDFPrint without any limitation, please buy a license for your software at https://www.verypdf.com/order_pdfprint_cmd_svr.html.

VN:F [1.9.20_1166]
Rating: 0.0/10 (0 votes cast)
VN:F [1.9.20_1166]
Rating: 0 (from 0 votes)
docprint pro

How to remove comments in docPrint preview application?

VeryPDF docPrint supports you to add comments on the pages of a file in docPrint preview application, It also supports you to edit comments like move,  copy and delete comments on current page in the Annotate Document dialog box. Assuming you know how to add comments on a page in the docPrint preview application, this article will show you how to remove comments, including how to remove a comment and how to remove all the comments on current page.  Supposing you are viewing the comments added on the current page in the Annotate Document dialog box as illustrated below,

image image

Then, you decide to remove the  comments on current page, you should do as follows:

First of all to make sure that the buttons on the toolbar be with color. Some of you might have met such condition: when you try to edit or remove a comment, you can do nothing with it. This is because you have click the Review Document button 360截图20111020153600953 image If you are under the same circumstances, you should click the Annotate document button  360截图20111024124057156  to make all the buttons colorful.

360截图20111020153237046

To remove one  comment

If you want to remove one of the comments, for instance the green ellipse on current page, you should click the ellipse, then it will be marked by a rectangle with tiny circles as illustrated as following:

image

Then, right click with the mouse, and select Delete on the menu or press Delete on the keyboard.

image

The green ellipse will disappear from the current page:

image

To remove all the comments

If you want to remove all the comments, you can right click with  the mouse on the page>choose Select All or press Ctrl+A on the keyboard.

image

then all the comments on current page will be selected.

image 

Right click one of the selected comments, and choose Delete or press Delete on the keyboard.

image

Then, all the comments disappear from the current page.

image

VN:F [1.9.20_1166]
Rating: 0.0/10 (0 votes cast)
VN:F [1.9.20_1166]
Rating: 0 (from 0 votes)
html converter (htmltools)

How to convert html to pcx format?

PCX is an image file format,which was the native file format for PC Paintbrush . It became one of the first widely accepted DOS imaging standards.The PCX file format has mostly been replaced by newer image formats such as GIF, JPEG and PNG,etc.but is still used by some fax and scanning applications. Multi-page PCX fax documents use the .DCX extension.

If you want to convert html to pcx format,you can use an easy to learn software called HTML Converter Command Line which can be downloaded at the website https://www.verypdf.com/htmltools/htmltools.zip .

Here are some steps for you to learn.

Step1.Click start menu and click “run” in the menu like figure1.Then input “cmd” in “open” edit box of the popup dialog and click “OK” button like figure2.

image

                                     figure1.

image

                                     figure2.

Step2.Input the commands to convert html to pcx in cmd.exe dialog box.The commands include the called program,source file,target file.Please look at figure3.

image

                                                                         figure3.

The commands are "C:\Documents and Settings\admin\Local Settings\Temp\htmltools\htmltools.exe" "www.verypdf.com" "C:\Documents and Settings\admin\Desktop\New Folder\.verypdf.pcx"

"C:\Documents and Settings\admin\Local Settings\Temp\htmltools\htmltools.exe"   stands for the directory of htmltools.exe.

“www.verypdf.com”  stands for the URL of the webpage you want to convert from html to pcx.

"C:\Documents and Settings\admin\Desktop\New Folder\.verypdf.pcx"  stands for the directory and name of target file.If you don’t specify the directory but only name the file,the target file will be saved in current directory automatically.But now it will be saved in the location you specified.Please look at figure4.

image

                                                                          figure4.

Then you can open the pcx file by some kind of viewer just like GSview,IrfanView,etc.

VN:F [1.9.20_1166]
Rating: 0.0/10 (0 votes cast)
VN:F [1.9.20_1166]
Rating: 0 (from 0 votes)