pdf to image converter

Can we convert PDF to TIF? how can we convert TIF file back to PDF file again?

The answers are absolutely yes. We can convert PDF file to TIFF file in Converter v2.1, and convert TIFF file to PDF file back in Image2PDF v3.2. PDF To Image Converter v2.1 and Image2PDF v3.2 are strong converting tool that always can help users with different kinds of format converting. You can look over this webpage for more info about PDF To Image Converter v2.1: https://www.verypdf.com/pdf2tif/index.htm#dl and you can download PDF To Image Converter v2.1 here: https://www.verypdf.com/pdf2tif/pdf2image.exe. Also for Image2PDF v3.2, you will know more info on it here: https://www.verypdf.com/tif2pdf/tif2pdf.htm#dl and download it here: https://www.verypdf.com/tif2pdf/img2pdf.exe. We can promise you will never regret browsing them in our website: verypdf.com.

Next, you will know how to convert PDF to TIF in PDF To Image Converter v2.1 and how to convert TIF to PDF in Image2PDF v3.2.

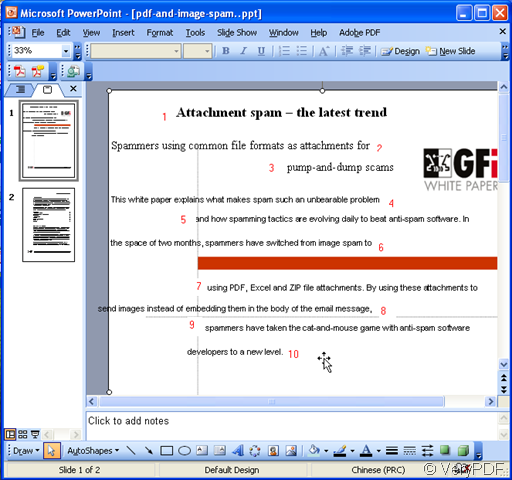
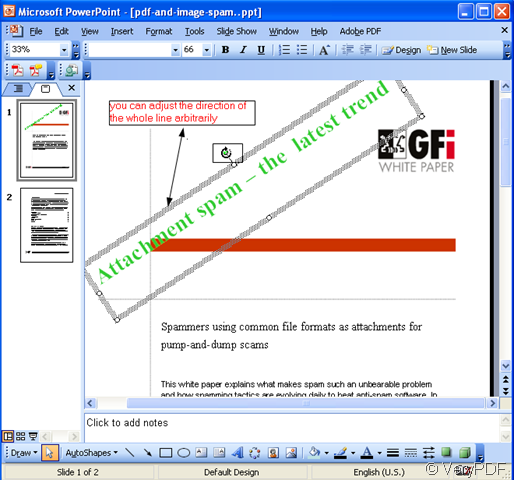
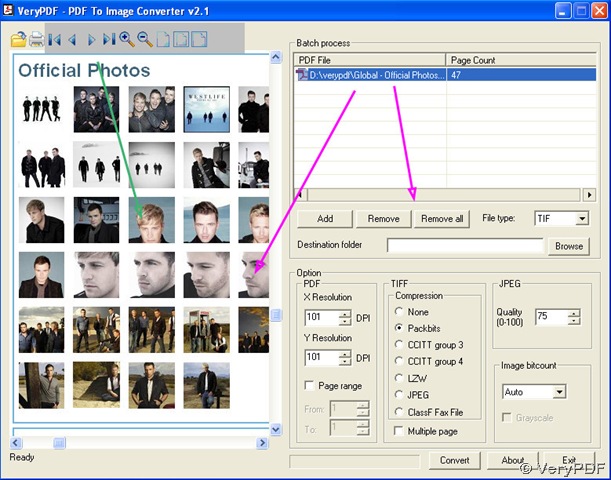
1. Download PDF To Image Converter v2.1 with watermarks from the link we gave you above. Install it and open the interface of PDF To Image Converter v2.1. To open a PDF file and look over it, refer to the following figures:

doubleconvert1

doubleconvert2

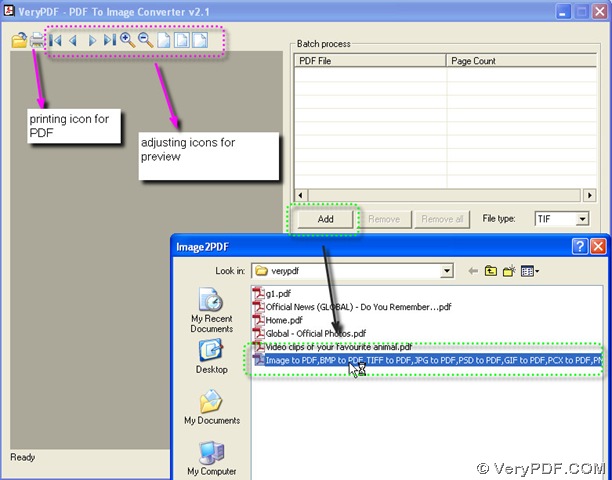
Choose target format as TIF and click “Browse” button to select a folder for your TIF as picture above.

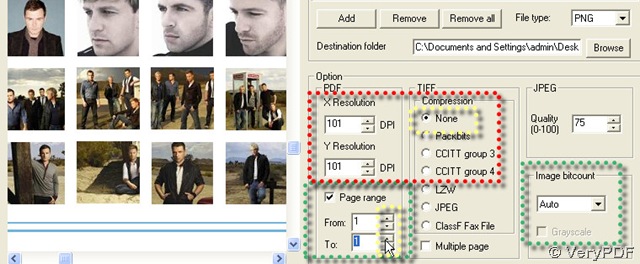
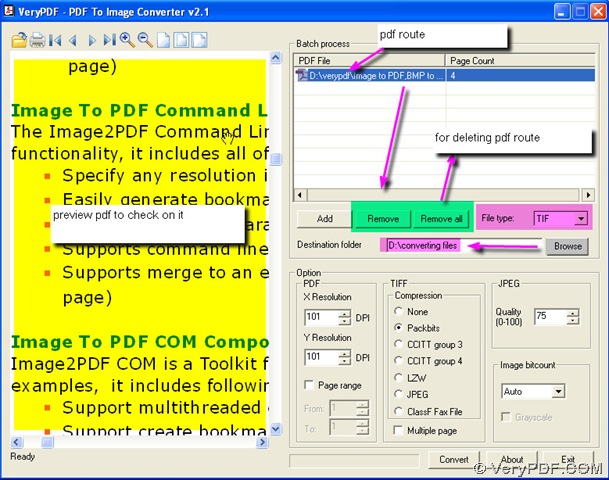
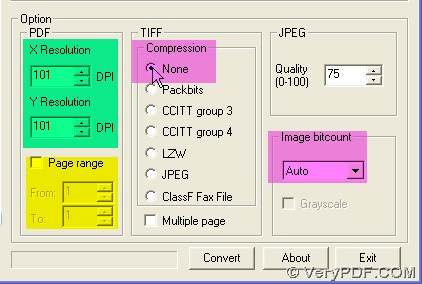
2. Look at “Option” field in PDF To Image Converter v2.1: to increase the dimension of TIF image with clearness and size, increase the value in DPI. Here we do not change any value in this interface of PDF To Image Converter v2.1. To get several pages converted, just activate “Page range” and set the range in “From” and “To” options. Here we choose defaulting setting to get all pages of PDF converted in PDF To Image Converter v2.1. For “Compression”, we click “None” and to get single TIF images, do not activate “Multiple page”. Keep “Auto” in “Image bitcount”.

doubleconvert3  

3. Convert PDF to TIF via clicking “Convert” button in PDF To Image Converter v2.1.

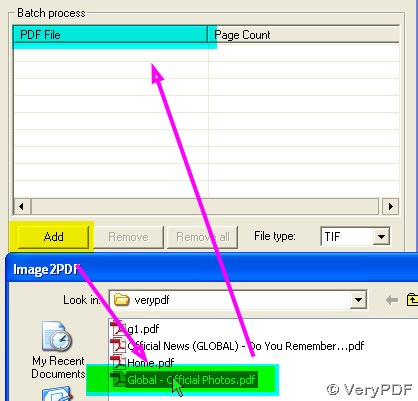
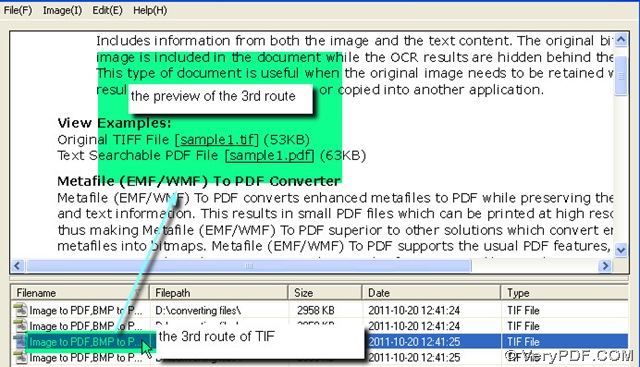
4. Open Image2PDF v3.2 to its interface, add your TIF images into it consecutively and preview your TIF image in Image2PDF v3.2.

doubleconvert4

doubeconvert5

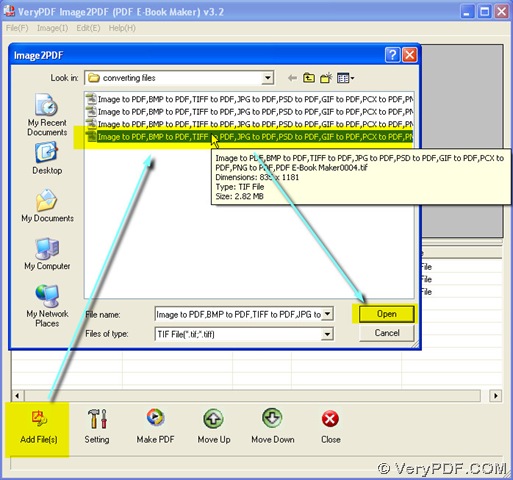
5. To set your target format and get PDF file in details, click “Setting” in Image2PDF v3.2. You will have many options in the pop window.

doubleconvert5

Also you can click options in “Base Setting”, “PDF Info”, “Bookmarks” and “Encrypt Options” to get more detailed PDF file. Here we will get one PDF file via choosing “Combine image into one PDF file”.

6. Click “Make PDF” to process converting in Image2PDF v3.2.

doubleconvert6

doubleconvert7

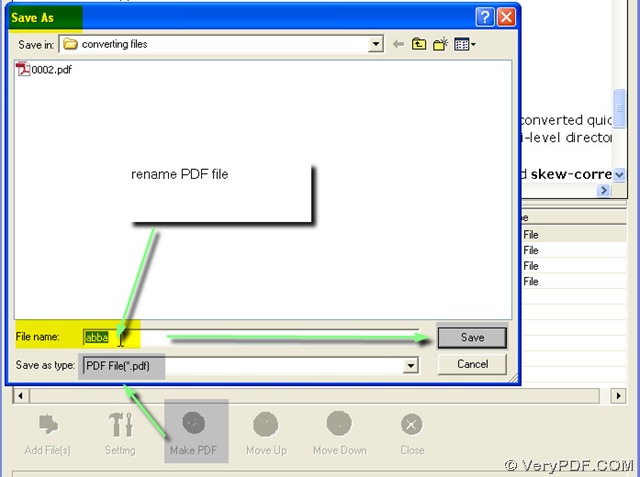
7. Your converting process will be done, you can find your PDF file in your folder.

Now we think you can learn about converting PDF to TIF and TIF to PDF file easily and quickly.

8. Close your Image2PDF v3.2.

Thank you for reading and correcting this article.

VN:F [1.9.20_1166]
Rating: 0.0/10 (0 votes cast)
VN:F [1.9.20_1166]
Rating: 0 (from 0 votes)
pdf editor

Can I delete/move/copy some annotations after have saved it in the PDF file by VeryPDF PDF Editor?

Annotations belong to comment, so deleting them must be under the state of comment, next is an annotation saved in a PDF file.

image

Having added the PDF file to VeryPDF PDF Editor click Comment icon in the toolbar, then click the annotation, thus the annotation is enclosed.

image

                                        Illustration 1

Delete: Enter “Delete” key, the annotation is deleted, or right-click and choose Delete.

image

                                 Illustration 2

Move:  In Illustration 1 there are four points when the annotation is enclosed. Drag any point of the annotation, the size of the annotation will be changed, while drag the space of the four lines including the four lines, the location of the annotation will be changed.  Notice the difference of the cursor.

image

image

Copy: In Illustration 2, choose Copy, then make the four lines that enclose the annotation disappear through click in other blank place, and then right-click choose Paste. See the illustration below:

image

image

VN:F [1.9.20_1166]
Rating: 0.0/10 (0 votes cast)
VN:F [1.9.20_1166]
Rating: 0 (from 0 votes)
pdf to powerpoint

What is the reconstruction mode in VeryPDF PDF2PPT Converter? How can I use it?

Thanks for your support for VeryPDF PDF to PowerPoint Converter.  I will try to explain it to you by the most plainest language.

We can have a look a the effect after converting from PDF to PPT by choosing the reconstruction mode. Take “pdf-and-image-spam.pdf” for example. It shows in the PDF file like this.

Snap3

Then I will convert it by PDF to PowerPoint Converter and choose “Exact reconstruction mode”. The picture shows like follows. It is not hard to find that each line’s position has been moved in the picture. But the pictures are still there.

Snap4

“Exact reconstruction mode”, just as its name implies,relates to exactly reconstruction of the converted PDF file. If you choose this menu option, in the converted PPT file, the text boxes will be shown in very little units. You can choose any part of the PPT to edit. By this kind of text box, you can adjust the font, the character color and even the direction of the whole line. It could create many different kinds of versions with the same content. Say if your viewers are young persons, you can make it more mischievously. If your viewers are adults, you can adjust it more serious and scripted. Meanwhile, this function can also be used to correct PDF file. Say there is a very little mistake in the PDF file, you want to correct it accurately, this function is quite helpful.                                                                                            

Snap5

As the pictures in the converted PDF file, compared with the two other options, there is not too many difference.  It also can not be edited but it could be used as background or extracted as a whole then the whole picture could be inserted as part of the PPT.

Notes: When you choose this option, the text can not be chosen as a whole. If you want to copy the whole to your paper or edit the whole, I am afraid this option is not your best choice.

VN:F [1.9.20_1166]
Rating: 0.0/10 (0 votes cast)
VN:F [1.9.20_1166]
Rating: 0 (from 0 votes)
pdf print

How to rescale the page size when printing a pdf document using a command line?

VeryPDF PDFPrint is a command line tool used for calling the system printers and then printing pdf documents. There are some articles about its command line options here and here. In this article, the author will present some examples of using other options for scaling the page size when printing a pdf document.

You can acquire the package of PDFPrint with the url http://goo.gl/bC7UN and unzip it into a directory of your Microsoft Windows computer. The author has unpacked it to the path of “D:\” and set the current directory of the MS-DOS command prompt window to “D:\pdfprint_cmd\”. The following commands are all used within the runtime condition above.

A basic command of using PDFPrint is

pdfprint readme.pdf <Enter>.

This command is using the default system printer to print the pdf document “readme.pdf”. The following commands are for rescaling the page sizes using options “-scalex” and “-scaley” in the printing process.

The options for scaling, “-scalex” and “-scaley”, must be used in pairs, which have three types of arguments of integer number. Arguments of number from 1 to 100 set the scaling percentages of PDF pages, of which 100 will not rescale the PDF pages (argument number larger than 100 will magnify the printing page). The argument of value “0” will stretch or shrink the scale of the page to fit the target paper size. Argument of “-1” will rescale both the height and width keeping the height-width-ratio fixed to the original ratio. Note that the argument “0” or “-1” can not be used together with the argument of number larger than 0, otherwise, either of the two options will be ignored by the program. Here are some examples of using the two options, “-scalex” and “-scaley”. Meanwhile, the arguments of “0” and “-1” can not be used together in one command line, either.

pdfprint –scalex 100 –scaley 100 readme.pdf <Enter>,

this will print the pdf document with the default system printer using the original (100%) page size of the document.

pdfprint –scalex 90 –scaley 100 readme.pdf <Enter>,

this will rescale the width of the page to 90% of the original size and keep the size of height unchanged (100%) when printing the document of “readme.pdf”.

pdfprint –scalex 90 –scaley 80 readme.pdf <Enter>,

this command line resizes the height of the page to 80% of the original size and resize the width to 90% when printing the pdf document, “readme.pdf”.

pdfprint –scalex 0 –scaley 0 readme.pdf <Enter>,

these commands will rescale both the page height and width of the pdf document to fit the paper size when printing the document.

pdfprint –scalex -1 –scaley -1 readme.pdf <Enter>,

this command line stretch or shrink both the height and width with the height-width-ratio equal to the original ratio.

The article just presented two command options supported by PDFPrint, and here are all the supported command options, http://goo.gl/l5RDv.

VN:F [1.9.20_1166]
Rating: 0.0/10 (0 votes cast)
VN:F [1.9.20_1166]
Rating: 0 (from 0 votes)
pdf to image converter

Can we add watermarks on PNG image when we need to convert PDF to PNG in PDF To Image Converter?

Well, PDF To Image Converter can not add watermarks into PDF or images, which support converting PDF to PNG.

Here we recommend users choose PDF To Image Converter v2.1 version, you can download it for a trial: https://www.verypdf.com/pdf2tif/pdf2image.exe, or buy it online after you know it here: https://www.verypdf.com/pdf2tif/index.htm#dl.

First, we will show you how to convert PDF to PNG in PDF To Image Converter v2.1.

1. Add PDF to PDF To Image Converter v2.1 and look over it in preview field to garantee it is what you want. If you want to delete it under PDF File, you can click Remove or Remove all button. To adjust its angle, please click those icons above preview field:

watermark1

watermark2

2. Select target format and choose a folder for your PNG image.

watermark3

3. Look at Page Count subject, you can see there is 47 exist that show you there are 47 pages in PDF file, which lead to 47 that is a value in To in Page range if you want to activate Page range(or just hide Page range to get all pages converted in PDF To Image Converter v2.1). Here we give 1 in To with 1 in From so that we can get 1st page converted to PNG image in PDF To Image Converter v2.1.

For DPI, we do not need to print PNG image, so maintain them in original values(or change their values bigger to get bigger size and dimension with deepen color in PNG image); keep None in Compression and Auto in Image bitcount.

watermark4

4. Convert PDF to PNG via convert button in PDF To Image Converter v2.1.

watermark5

Now we will reveal how to add watermarks in your PNG image.

Before operating it, we suggest you install imgconv.exe in your computer, otherwise you will not make your PNG with watermarks.

1. Click start > cmd > ok, you can get a window, then input cd\ and click enter on your keyboard:

watermark6

Then type:

"C:\Program Files\docPrint Pro v5.0\imgconv.exe" -font Arial -pointsize 100
-draw "text 0,0 'LOVE'" -gravity NorthWest
C:\Documents and Settings\admin\Desktop\1.png  E:\pics\output.png

In last command, the red command represent the location of imgconv.exe, the green --->format of watermark that you can change for another one with keeping the word text x,x werdfded still, –font, –pointsize and -gravity, the black one --->the location of original PNG, the purple one ---> the location of converting PNG.

Click enter button on your keyboard at last. You will get your own PNG with watermark(s). Here is the programme and our PNG image.

watermark7

watermark8

Thank your for rectify it.

VN:F [1.9.20_1166]
Rating: 0.0/10 (0 votes cast)
VN:F [1.9.20_1166]
Rating: 0 (from 0 votes)