pdf editor

How to edit a PDF format file by use of verypdf pdf editor?

First download the software of “verypdf pdf editor” in www.verypdf.com

Its icon is this:

image

Then open it, and click “open” and add a pdf file in, below is the illustration:

image

Then the new picture is below:

Choose the toolbar of “edit content” and click it, then two icons will light abruptly, below is the illustration:

choose the icon “T+” and put your cursor in the pdf space and click left-button of your mouse, a dialog window pops, then you can edit, below is the illustration:


VN:F [1.9.20_1166]
Rating: 0.0/10 (0 votes cast)
VN:F [1.9.20_1166]
Rating: 0 (from 0 votes)
docprint pro

How to convert Excel to PCX image?

Well, if you have  a good document converter like , this problem can easily be solved. In this article. I would like to take VeryPDF docPrint Pro as an example to show you how to use an all to all document converter to convert Excel to PCX image. I found docPrint Pro at https://www.verypdf.com two months ago, and now I am really enjoy using it.

Step1: Run docPrint Pro.

Step 2: Set options.

1 Press “Setting”, we will see a new panel as below:image image

image

2 Select “.pcx” on the drop-down menu of “output format”.

Moreover, you can choose to view or not to view the image after conversion by click on the checkbox on the left of “View after conversion”.

When you need to change the pixel, go press on “Save Image Mode”, then you will see the panel as below. Select  the proper option on the drop-down menu beside  “Image Resolution”. You can also change the color depth  on the same panel. After you have set all the option, don’t forget to click on “OK” .

image

3 Conversion

Press “Start”, you will see a prompt as following:

 image

Select a directory to save the PCX image, and press “OK”. The computer will start converting. The process will finish in seconds.  When the icon of this software which looks like a printer disappear from the taskbar in the left-down corner of your computer, the PCX image will appear in  your computer.

VN:F [1.9.20_1166]
Rating: 0.0/10 (0 votes cast)
VN:F [1.9.20_1166]
Rating: 0 (from 0 votes)
docprint pro

How can I convert multiple Excel files to PNG images quickly?

PNG has many advantages over the GIF and even TIFF image format. One advantage of PNG is that it  offers  the alpha channel, with which, a PNG image  is capable of 256 levels of transparency. It means that you can  apply a true drop shadow which fades into the background and take any shape or form, etc.

In this article I would like to introduce the most fast and quick  way to convert  multiple Excel files to PNG images.

Step 1: Download  VeryPDF docPrint Pro which you can find at https://www.verypdf.com, and install it in your computer. I was recommended to try this  document converter by my colleagues three months ago,  and now I think you really need to  try it. This is a real all to all converter.

Step 2: Run VeryPDF docPrint Pro.

Step 3: Set the output format by clicking on “setting” on the panel and selecting  “output setting” to “.png”. Make sure you click on “OK”.

Step 4:  When you have  multiple Excel files to convert, you can drag them all to the list box. Because docPrint Pro supports batch conversion, you can covert all the Excel files to PNG images at one time by pressing “Start” after selecting  all of the files.

Step 5: Select a directory to save the PNG image(s).

In conclusion,  only five steps you need to do: Install docPrint Pro>>run docPrint Pro>>set output format>>start converting Excel to PNG >>save.

VN:F [1.9.20_1166]
Rating: 0.0/10 (0 votes cast)
VN:F [1.9.20_1166]
Rating: 0 (from 0 votes)
docprint pro

How to convert Excel to PNG image

Well, to convert Excel to PNG image fast and quick, you may need to download a converter, which I recommend you to use VeryPDF docPrint Pro. You can find it at https://www.verypdf.com . The following steps will show you how to use it to convert Excel to PNG image.

First, run docPrint Pro.

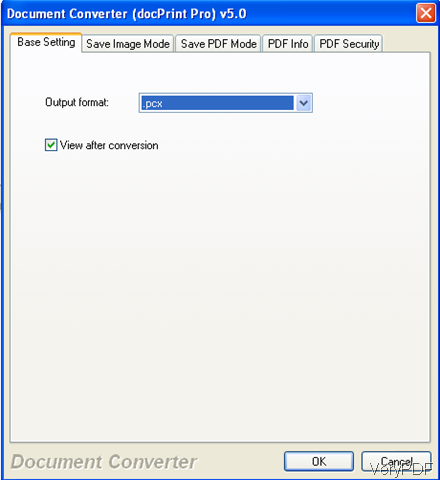
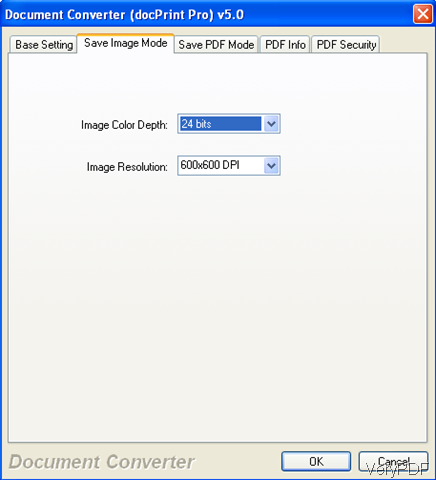
Second, press “Setting” and select the output format to “.png”. Don’t forget to press “OK’ .

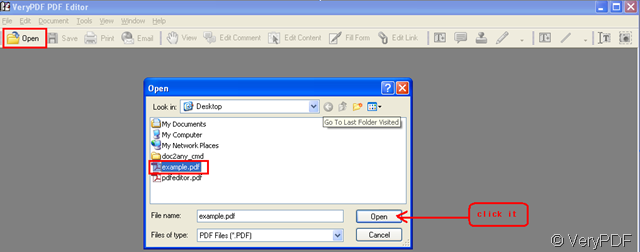
Third,  drag the Excel file you want to convert to the panel of the software.

forth. press “Star” and select the directory to save the PNG image in your computer. Don’t forget to press “Save”.

When the icon of the software which looks like  a printer disappear from the taskbar, the conversion is finished and the converted PNG image is saved in your computer.

You can also use DOS to convert  Excel to PNG image.
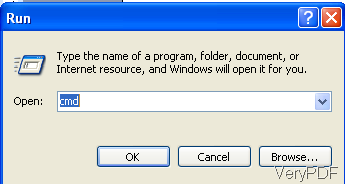
First, run DOS.

“Start”>>”run”>>input “cmd”>>”OK”

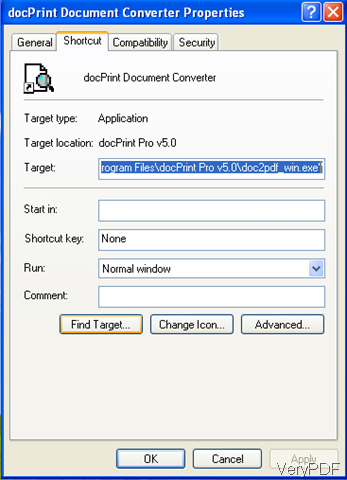
Second, run docPrint Pro

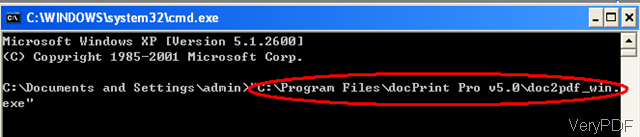
Drag the converter icon in the original program file to DOS>>leave one space>>drag the Excel file you want to convert to DOS>>leave one space again>>drag the mentioned Excel file to DOS again>>change the file extension of the second file in DOS from “.xls” to “.png”

Third, press “Enter” on your keyboard. Then, the PNG image is saved in the same file where the original Excel file is.

You can try both the methods and choose the one you feel more convenient.

VN:F [1.9.20_1166]
Rating: 0.0/10 (0 votes cast)
VN:F [1.9.20_1166]
Rating: 0 (from 0 votes)
docprint pro

How to convert Excel to TIF image?

There are various ways to convert Excel to TIF. The simplest way is to use an all-to-all converter like VeryPDF docPrint Pro to convert Excel document to TIF image. In this article I will tell you how to convert Excel to TIF with DOS.

Step 1:Run DOS

Press “Start”>>select “Run”

>>input “cmd” to run DOS

image

Then, you will see a prompt as follows:

Step 2:Drag docPrint Pro to DOS

If docPrint Pro is on the desktop, you have to find its target location. You can do as following: Right-click on the icon of docPrint Pro with the mouse>>select “Properties” on the menu,

>> Then, you will see the prompt as below. Press “Find Target” >>press “OK”

image

>>Your computer will find the target automatically. Drag the program into DOS, the directory will present in DOS. >> click in DOS and press “Blank” key on your keyboard

image

Step 3: Input Excel file

Drag the Excel file you want to convert to DOS

>>remember to click in DOS and then press “Blank” key

Step 4:Output TIF file

Drag the mentioned Excel to DOS again, and change the extension name from .xls to .tif.

image

before change

image

after change

Step 5: Press “Enter” key.

The conversion will finish in seconds.

VN:F [1.9.20_1166]
Rating: 0.0/10 (0 votes cast)
VN:F [1.9.20_1166]
Rating: 0 (from 0 votes)