Create a custom paper size in Windows 7 for docPrint and docPrint PDF Driver
docPrint Printer supports custom paper
sizes, but some paper sizes may need to be added manually in order to appear in
the paper size list in docPrint Printer. Microsoft’s latest operating system,
Windows 7, requires a few different steps than older versions. Read more to find
out how.
Add Custom Paper Size
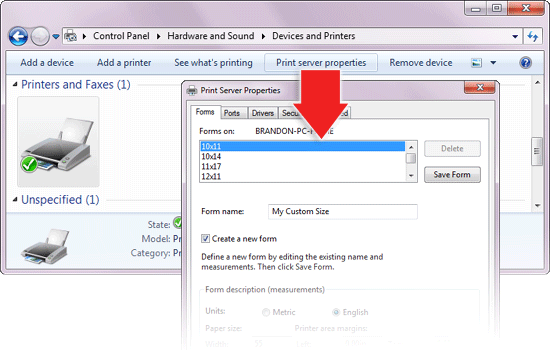
To define a new page size (form), follow these steps:
The new sizes should now appear in the page size selector in the docPrint Printer Configuration. If it does not appear, then it is it too large or too small to be printed by docPrint Printer.
VeryPDF.com
|
VeryDOC.com |
VeryPCL.com |
Links |
Contact
Copyright © 2002- VeryPDF.com, Inc. All rights reserved.
Send comments about this site to the
webmaster.