A ZIP file is simply a file filled with information, data or documents that have been through a compression process to minimize the size of the files making them quicker to download, easier to archive and more likely to be received via electronic mail because the compressed format takes up less storage space and uses fewer system resources.
It is easy to make a zip file by PDFcamp Printer and you don’t need to know anything about HTML code. There are no interface concerns. Basically, you just open the program and follow the instructions I give to you to create a zip file. You name the file and choose where you want it to be stored in your system.
The following snapshots will be a course for you to learn how to use ZIP compression when print documents to pdf files by using PDFcamp Printer,which is easy to master.
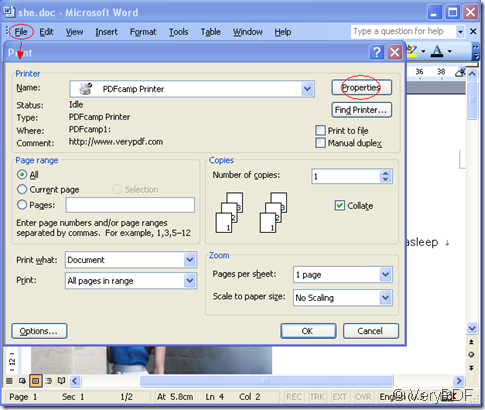
Step1.Click “file”—“print”—“properties”.
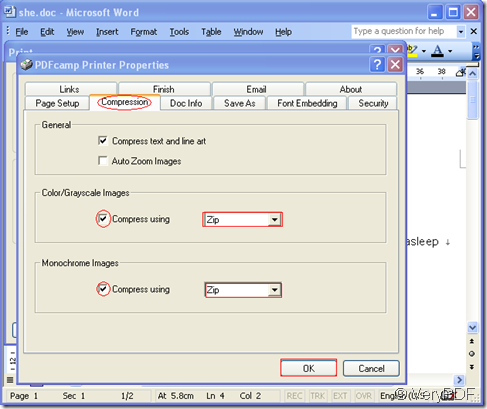
Step2.Click “Compression” in properties and check “compress using” and select “Zip”in dropdown lists and click “OK”.
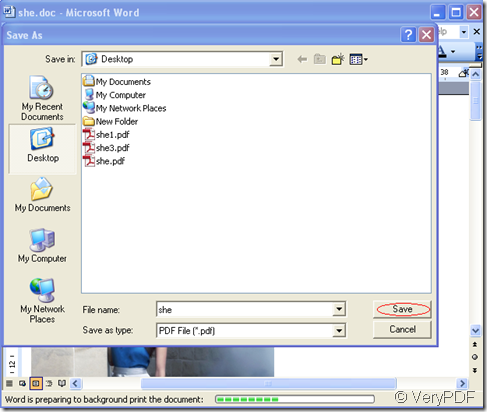
Step3.Save your file in some folder you like and name the new file.Then click”save”.
You can see the new pdf file generated by PDFcamp Printer.If the size of original document is big,you will find it will be smaller after printing.


