Think you may need open a file in AutoCAD and convert it to other image format file, such as jpeg. How to do and which software you can choose? First, supporting the function of converting AutoCAD to jpeg is the most important element of the software. In addition, the price and running speed may be the considerations. So you can convert the files of AutoCAD to jpeg or dwg to jpeg with the help of docPrint Document Converter Professional.
docPrint Document Converter Professional(docPrint Pro) is a software product that dynamically converts MS Office 97/2000/XP/2003/2007, WordPerfect, AutoCAD DWG, PostScript, Adobe Acrobat PDF and many other document types to Adobe Acrobat PDF, PostScript, EPS, XPS, PCL, JPEG, TIFF, PNG, PCX, EMF, WMF, GIF, TGA, PIC, PCD and BMP etc formats. It works in both GUI version and Command Line version. With docPrint Document Converter Professional you can convert your documents from and to 50+ formats easily.
There are three applications in docPrint Pro, which are GUI application, command line application and virtual printer. There are two kinds of virtual printer in docPrint Pro—docPrint and docPrint PDF driver. You will see how to convert files of AutoCAD to jpeg with one of the virtual printer—docPrint in this article. The conversion steps are easy enough even though you don’t know much about the computer.
To convert AutoCAD to jpeg conveniently, You’d better download docPrint Pro at https://www.verypdf.com/artprint/docprint_pro_setup.exe and install it in your computer first. You can set docPrint Pro as the default printer when you install docPrint Pro, which will help you save a lot of time and you don’t need to do some useless operations.
The first step: Run printer driver.
Please open the dwg file in AutoCAD and click “File”—“Plot” to run the printer driver in your computer.Please see Figure1. Than you will see a dialog box named “Plot-model” pop up, in which you should choose the current printer as “dcoPrint” in “Name” combo box as Figure2 shows. Then click “OK” button to continue.
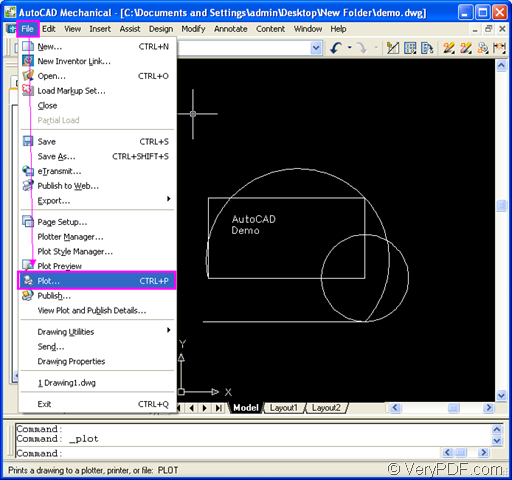
Figure1.
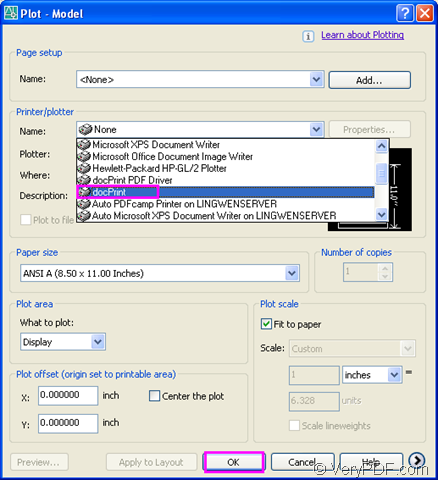
Figure2.
The second step: Open “Save As” dialog box.
In popup “docPrint” dialog box showed in Figure3, please try to open “Save As” dialog box by the following advices.
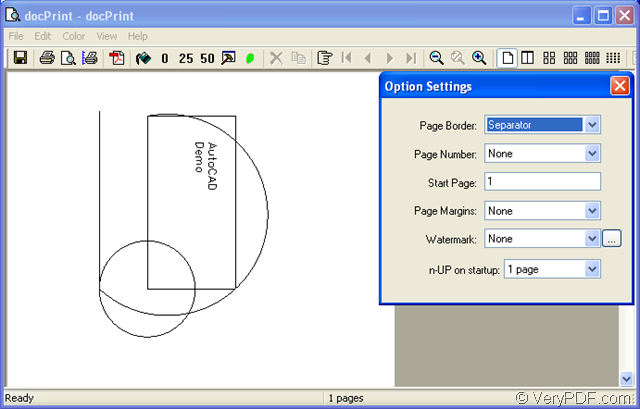
Figure3.
You can click “File” and click “Save as” in dropdown list. You can also click the icon ![]() in the toolbar, which means “save files”. An other way can also be taken by pressing “Ctrl”+ “S” on your keyboard at the same time, which is the hot key for your reference. These three ways can all open “Save As” dialog box in which you can change some settings to the output file.
in the toolbar, which means “save files”. An other way can also be taken by pressing “Ctrl”+ “S” on your keyboard at the same time, which is the hot key for your reference. These three ways can all open “Save As” dialog box in which you can change some settings to the output file.
The third step: Save your target file.
In “Save As” dialog box showed in Figure4, please operate as follows:
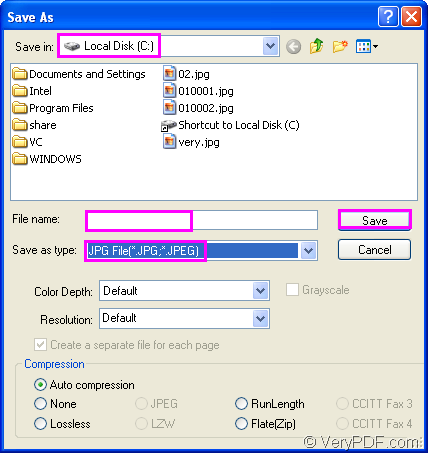
Figure4.
You should select a location for your target file in “Save in” combo box, edit a name for the target file in “File name” edit box and specify the file type for the target file in “Save as type” combo box. Then click “Save” button to save all the changes and start the conversion of AutoCAD to jpeg.
You will find your target file in the location you have set, which marks the end of the conversion.