If you want to convert files of AutoCAD to pic, you can choose a powerful converting software called docPrint Document Converter Professional which can convert MS Office 97/2000/XP/2003/2007, WordPerfect, AutoCAD DWG, PostScript, Adobe Acrobat PDF and many other document types to Adobe Acrobat PDF, PostScript, EPS, XPS, PCL, JPEG, TIFF, PNG, PCX, EMF, WMF, GIF, TGA, PIC, PCD and BMP etc formats. It works in both GUI version and Command Line version. With docPrint Document Converter Professional you can convert your documents from and to 50+ formats easily. You can also call docPrint Document Converter Professional as docPrint Pro for short.
This article will introduce one application in docPrint Pro—docPrint, a virtual printer. There are two other applications in docPrint Pro for your choice, one is GUI application and the other is command line application.You can download docPrint Pro at https://www.verypdf.com/artprint/docprint_pro_setup.exe. If you don’t want to use the GUI and command line application, you can download docPrint Document Converter standard version at https://www.verypdf.com/artprint/docprint_setup.exe, which has virtual printer only and cheaper than the Pro version.
The installation steps about docPrint Pro are simply easy and you can finish it only following the prompts in each dialog box.
The first step
You should run the printer driver at the beginning of the conversion of AutoCAD to pic. Please open the dwg file in AutoCAD and click “File”—“Plot” to open the “Plot-model” dialog box showed in Figure1. Then choose “docPrint” as the current printer in “Name” combo box and click “OK” button.The hot key “Ctrl”+ “P” can also work.
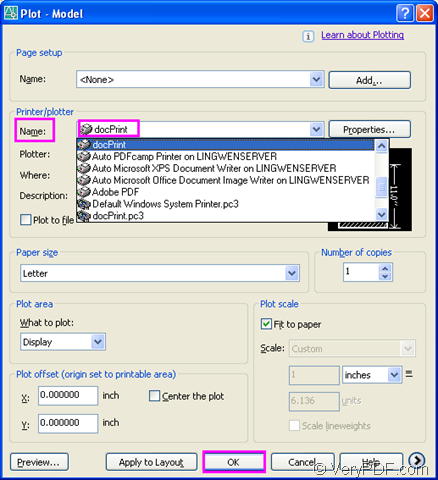
Figure1.
If you have set docPrint as the default printer in your computer, you can right click the dwg file and choose “Print” option in dropdown list instead of opening the file.
The second step
Then you will see a new dialog box called “docPrint” showed in Figure2 appear. You should do the operations as follows in this dialog box.
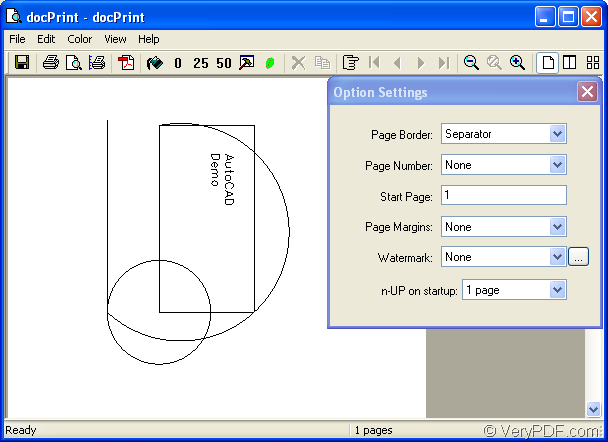
Figure2.
You can click “File” – “Save as” to open “Save as” dialog box. You can also click the icon ![]() to save file. Or you can use the hot key “Ctrl”+ “S” .
to save file. Or you can use the hot key “Ctrl”+ “S” .
The third step
In “Save As” dialog box showed in Figure3, please finish the following changes:

Figure3.
Specify the path for the target file in “Save in” combo box, edit the name for the target file in “File name” edit box, choose the file type in “Save as type” combo box and click “Save” button to save all the changes and run the conversion.
The last thing you should do is waiting! Just wait for several seconds and you will get the target file after the covnersion of AutoCAD to pic in the specified location.
This is another nice tutorial for me. Very elaborate write up. Now you make it easy for me to understand and implement the concept.
Paper to CAD conversion Raster to Vector Conversion