PNG is an image file stored in the Portable Network Graphic (PNG) format, which could contains a bitmap of indexed colors under a lossless compression, but without copyright limitations. PNG is commonly used to store graphics for Web images.
The PNG format was created in response to limitations with the GIF format, primarily to increase color support and to provide an image format without a patent license. Additionally, while GIF images only support fully opaque or fully transparent pixels, PNG images may include an 8-bit transparency channel, which allows the image colors to fade from opaque to transparent.
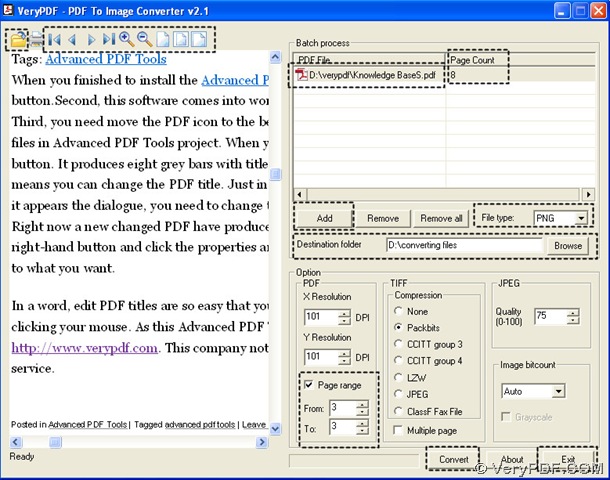
How to convert the 2nd page of pdf to png? first, I need to introduce PDF To Image Converter v2.1 to you, which is a functional converter based on converting pdf to png and other image format without loss. And here is the solution on convering the 2nd page of pdf to png in PDF To Image Converter v2.1.
1. Launch your PDF To Image Converter v2.1 in your computer.
2. Add your pdf into PDF To Image Converter v2.1: click “Add” button to get your pdf in the dialog box, and click “open” button in that dialog box, you will see your pdf is shown as a pdf route in the form of batch process in PDF To Image Converter v2.1.
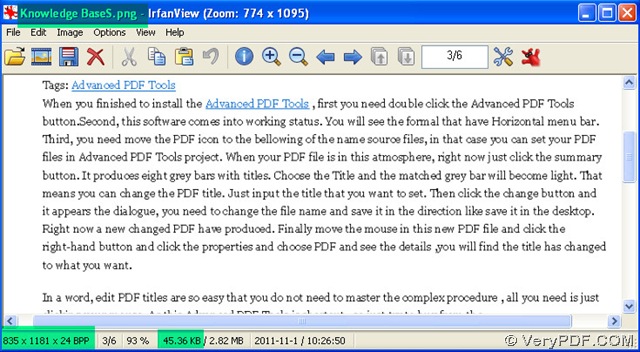
3. Review your pdf in PDF To Image Converter v2.1: click the open button in the toolbar in the preview panel of PDF To Image Converter v2.1, a dialog box is popup, where you need to choose that pdf file and click “open” button, then you will see your pdf is shown in the preview panel of PDF To Image Converter v2.1. You can use the series tool buttons of toolbars to adjust its angles and check on your pdf file on the preview panel carefully.
4. Select your destination format and folder in PDF To Image Converter v2.1: click the edit-box of “File type”, a dragging list is popup, where you need to check PNG, which is your targeting file type; click “Browse” button to get a dialog box, where you need to select a folder for your png image, after clicking that folder in that dialog box, please click “ok” button there, then this folder that is your objective folder is shown as a route in the edit-box of “Destination folder” in PDF To Image Converter v2.1.
5. With the help of step2, you could see there are 8 pages in this pdf file, so in this step, you could activate page range in operation panel in PDF To Image Converter v2.1, which is an essential point for setting the range of converting the 3rd page of pdf to png: click the check-box of “Page range”, you will see there are 2 edit-boxes, which are “From” and “To”, in those edit-boxes, you need to input 3 in them, which is a guarantee of converting only the 3rd page of pdf to png.
6. After these elementary setting in PDF To Image Converter v2.1, you can process the task on converting pdf to png: click “Convert” button, then wait for several seconds, you could find your png image in your destination folder, then close your PDF To Image Converter v2.1 through clicking “Exit” button on the panel.
For more info on PDF To Image Converter v2.1, please check this link: https://www.verypdf.com/pdf2tif/index.htm#dl.