Surely, you can remove the bleed box on one condition that all information the pdf file contains should be intact. Sometimes it is no easy and convenient for you to remove it, because it might affect the visual effect of you pdf file. Based on this, you can use Advanced PDF Tools Command Line to remove pdf bleed box, with which your boring work will become interesting.
You can download Advanced PDF Tools through the following link posted below
https://www.verypdf.com/pdfinfoeditor/advanced_pdf_tools_cmd.zip
Do remember extract it after the download is completed, for it is zipped package.
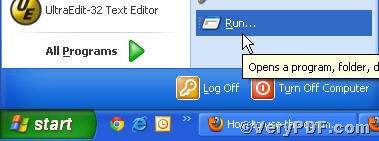
To active this function you are bound to launch the MS-DOS command prompt window, look at the screenshot, and they will assist you
Click “start”

Then “Run”
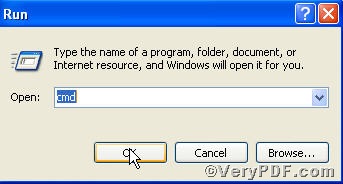
Input cmd just as the picture indicates below
After the the steps, you will have the below box
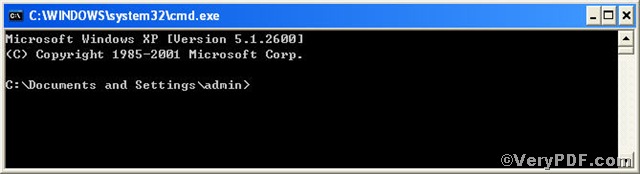
Here, you can type the command line to remove pdf bleed box.
pdftools -i “C:\input.pdf” -o “C:\output.pdf” -X “Bleed:Remove”
where the option -i is to specify a pdf file name or a directory for input, the option -o to specify the pdf file name for output, and-X is to remove or set Crop, Bleed, Trim, Art boxes, here “Bleed:Remove” is to remove pdf bleed box.
Once the input is done, please press the “enter” key
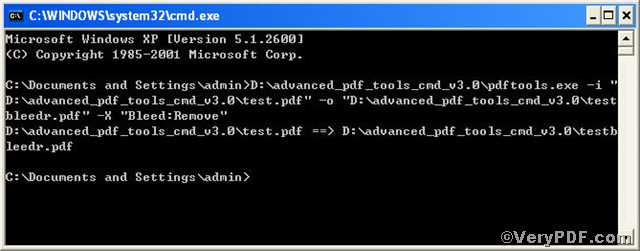
When you see this, it tells that your operation goes smoothly.
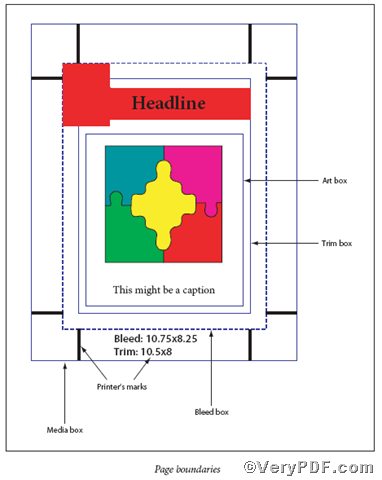
If you are confused with the Crop, Bleed, Trim, Art boxes, you can take the following chart as reference.