This article is going to illustrate that how to remove pdf trim box using Advanced PDF Tools Command Line. Advanced PDF Tools Command Line is quite useful for you to edit pdf file, especially to remove pdf trim box.
You can freely download Advanced PDF Tools through the following link posted below
https://www.verypdf.com/pdfinfoeditor/advanced_pdf_tools_cmd.zip
Do remember extract it after the download is completed, for it is zipped package.
To active this function you are bound to launch the MS-DOS command prompt window first, look at the screenshot, and they will assist you
Click “start”

Then “Run”
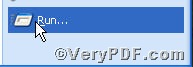
Input cmd

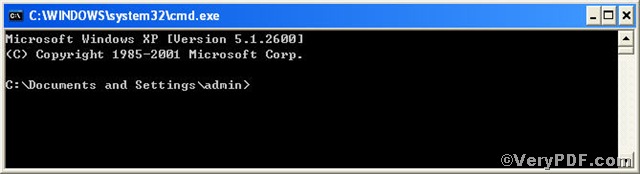
After several steps, you will have the MS-DOS command prompt window
Here, you can type the command line to remove pdf trim box.
pdftools -i “C:\input.pdf” -o “C:\output.pdf” -X “Trim:Remove”
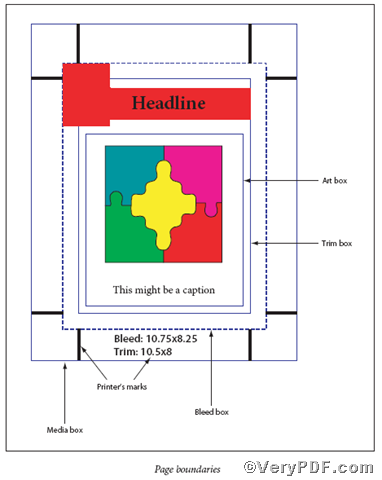
where the option -i is to specify a pdf file name or a directory for input, the option -o to specify the pdf file name for output, and-X is to remove or set Crop, Bleed, Trim, Art boxes, here “Crop:Remove” is to remove pdf trim box.
Once the input is done, please press the “enter” key
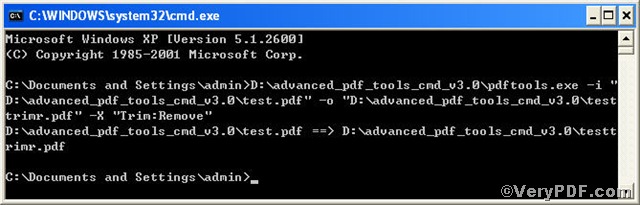
When you see this, it tells that your operation is correct.
To make you can understand the article, the VeryPDF.com posts the picture below to help you, if you have further needs on pdf files, you can visit at www.verypdf.com for more wonderful experiences.