With the help of docPrint Document Converter Professional, you can fulfill the conversion from odt to xbm easily because docPrint Document Converter Professional is a document converter which can convert any printable documents such as MS Office Word, Excel, PowePoint, OpenOffice, PDF, etc. to image formats such as GIF, BMP, TIFF, PNG, PS, MNG, etc. So converting OpenOffice document of odt to xbm is a piece of cake for docPrint Pro which is short for docPrint Document Converter Professional.
In this article, you will see the conversion step with the virtual printer application which is named as docPrint of docPrint Pro. It is a good helper in you word when you want to save paper and ink because it supports to scale page size. At the same time, it is also an excellent document converter which can give you three steps for completing the conversion from the printable documents to images.
For using docPrint smoothly, you should download docPrint Pro first at https://www.verypdf.com/artprint/docprint_pro_setup.exe. After you install and it on your computer, you will be able to see docPrint in the printer list by clicking “Start” and “Printers and Faxes” in the start menu.
You should open the ODT document which is to be converted and click “File”—“Print” to open the “Print” dialog box. In the “Printer” combo box, you need to choose “docPrint” as your printer, then please click on “Print” button. If you want to use some other way to open the “Print” dialog box, please choose the hot key “Ctrl”+ “P”. If docPrint is the default printer, work comes easy. You just need to right click the ODT document and click “Print” option in the dropdown list to run docPrint directly.
Then you will see the main window of docPrint on your computer screen. In the window, you should use some way to open the next dialog box—“Save As” dialog box. There are some ways for your choice. The first one is to click “File” and click “Save as” in the dropdown list. The second one is to use the “Save File” button in the toolbar. The third one is to press “Ctrl”+ “S” on the keyboard.
The “Save As” dialog box enables you to save odt to xbm via four necessary operations. The first one is to choose the output directory for your target file in “Save in” combo box. The second one is to input a name for the target file in “File name” edit box. The third one is to ensure the output format in “Save as type” combo box. The last one is to click “Save” button for saving all the changes. Please see the “Save As” dialog box in Figure1.
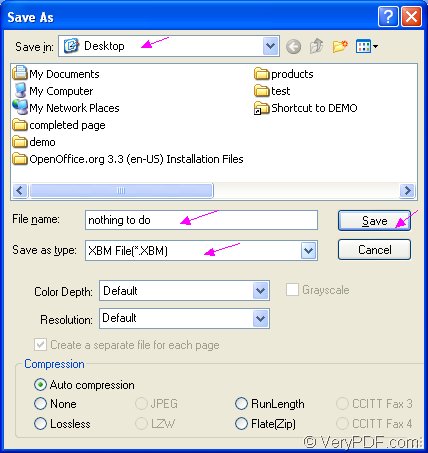
Figure1.
For opening the target file in the specified location, you should wait for the conversion from odt to xbm finishing. If you want to get some more information about the application docPrint Pro, please click here to enter its homepage.