With the help of Document Converter, you can convert webpage to jpc easily and quickly within three steps. In this article, you will see the conversion steps in details. Before that, you should know what is Document Converter.
Document Converter is a kind of document converter which enables you to convert any printable documents to image formats. The documents formats contain Microsoft Word, Excel, PowerPoint, OpenOffice, Webpage, PDF, etc. The image formats contain BMP, JPG, JPC, PNG, PNM, TIFF, TGA, ect. So converting webpage to jpc is only a piece of cake to Document Converter.
Document Converter is consisted of three internal applications—GUI application, command line application and virtual printer application which are designed for meeting different needs. Please use the GUI application if you want to convert documents to images in batch; If you want to develop some kind of software basing on Document Converter, you can choose the command line application. To save paper and ink, of course you should choose the virtual printer application.
At the same time, the virtual printer docPrint can also be seen as a document converter which is also has the ability to convert any printable documents to image formats. So you can use it for your work. Please download Document Converter at https://www.verypdf.com/artprint/docprint_pro_setup.exe if you want to use docPrint.
The first step is to run the printer driver to run docPrint. Please open the Webpage and use the hot key “Ctrl”+ “P” to open the “Print” dialog box. In the opened Webpage, you can also click “File”—“Print” to open the “Save As” dialog box. Then please choose “docPrint” as current printer in “Printer” combo box and click “OK” button.
The second step is to open “Save As” dialog box in docPrint main interface which appears on the interface of your screen. You can click the “Save File” button in the toolbar or use the hot key “Ctrl”+ “S” combination to open the dialog box. You can also click “File”—“Save as” to open the “Save As” dialog box.
The last step is to save webpage to jpc in “Save As” dialog box. Please see the dialog box in Figure1. You are able to make some changes to the target file in the combo boxes and edit box in this dialog box. In “Save in” combo box, you should find a suitable location for the target file. In “File name” edit box, please input the name for the target file. In “Save as type” combo box, you are able to choose the right output format for the target file. Then please click on “Save” button.
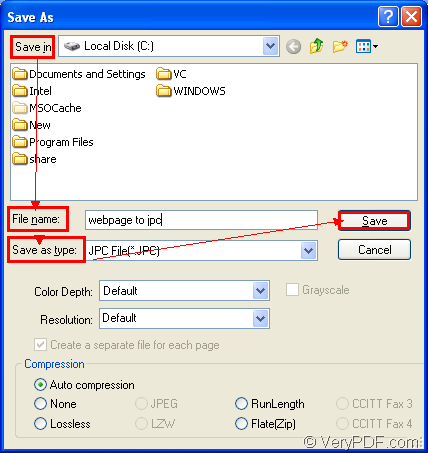
Figure1.
At last, you will get the target file after the conversion from webpage to jpc. If you want to read more articles about docPrint or Document Converter, you can visit the blog: VeryPDF Knowledge Base.