html converter (htmltools)

How to convert html to pnm format?

HTML Converter Command Line will be a good choice if you want to convert html to pnm.Because HTML Converter Command Line allows you to convert web pages to PDF, PS (postscript), WMF, EMF vector formats.It also allows you to create previews or thumbnails of web pages in a number of different formats, such as TIF, TIFF, JPG, JPEG, GIF, PNG, BMP, PCX, TGA, JP2 (JPEG2000), PNM, etc.

The steps here will show you how to convert html to pnm format.

Step1.Download HTML Converter Command Line at https://www.verypdf.com/htmltools/htmltools.zip.

2.Install HTML Converter Command Line.When you finish loading the software,you will find it is a zip file.You should unzip it first then it can be used.But if you want to use HTML Converter Command Line smoothly without any limitation, you should register it in cmd.exe dialog with the code you get when buying HTML Converter Command Line.

The registering steps are as follows:

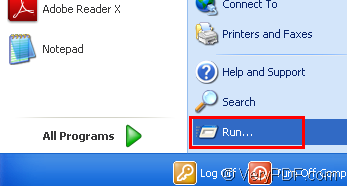
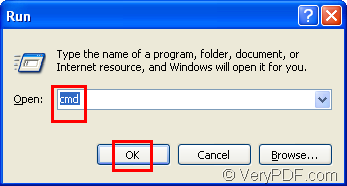
(1) click “start” – “run” and input “cmd” in “open” edit box.Then click “OK” button to run cmd.exe.Please look at figure1.
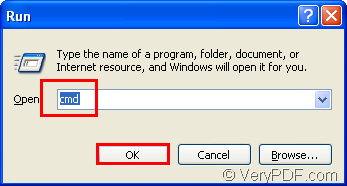
image

                                   figure1.

(2)In cmd.exe dialog box,you should change the current directory to the installation path of HTML Converter Command Line by “cd” command.Then input the register code and press “Enter” button on your keyboard.Please look at figure2.
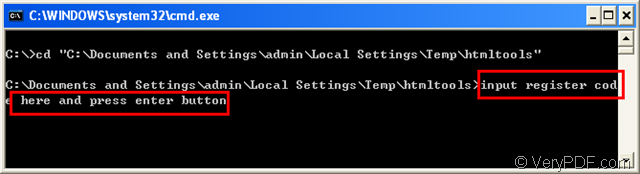
image 

                                                                           figure2.

The command cd "C:\Documents and Settings\admin\Local Settings\Temp\htmltools"  means change the current directory to C:\Documents and Settings\admin\Local Settings\Temp\htmltools.

Step2.After registering,you can input commands in cmd.exe dialog box to convert html to pnm.Please look at figure3.
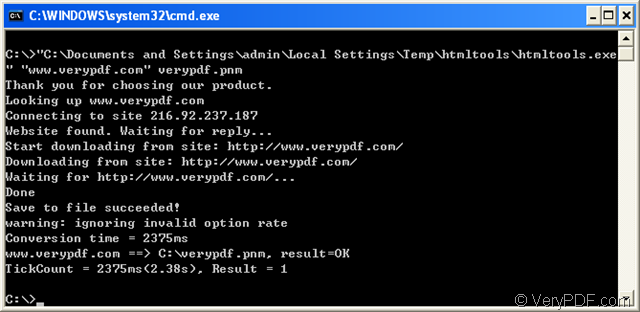
image

                                                                        figure3.

The whole conversion commands are "C:\Documents and Settings\admin\Local Settings\Temp\htmltools\htmltools.exe" "www.verypdf.com" verypdf.pnm

"C:\Documents and Settings\admin\Local Settings\Temp\htmltools\htmltools.exe"  stands for the path of htmltools.exe.

“www.verypdf.com  stands for the URL of source file—webpage.

  verypdf.pnm  stands for the name of target file which you can set by yourself.But the extension name must be .pnm.

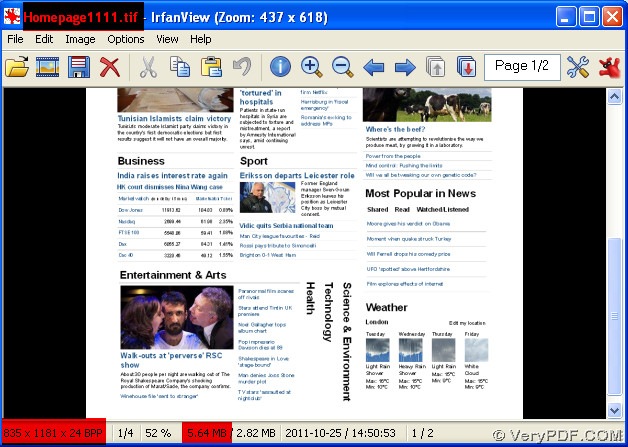
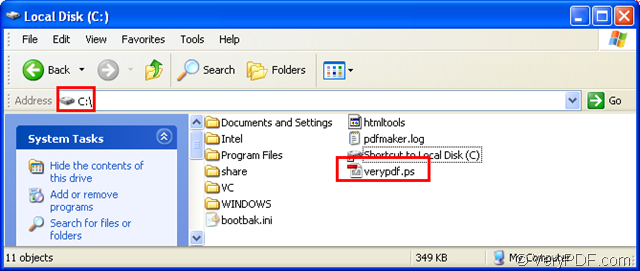
Step3.Then you can see the target pnm file in C disk and you can open the pnm file by some kind of viewer like GSview or IrfanView,etc.Please look at figure4.
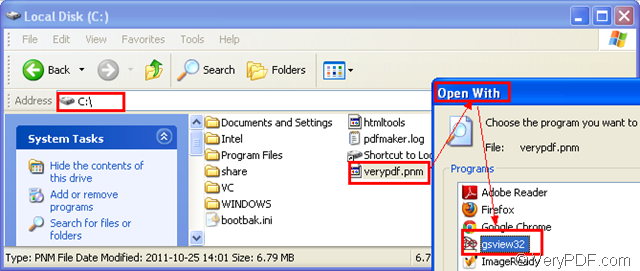
image

                                                                        figure4.

VN:F [1.9.20_1166]
Rating: 0.0/10 (0 votes cast)
VN:F [1.9.20_1166]
Rating: 0 (from 0 votes)
pdf to image converter

How to convert PDF to TIF and make tif colorful as original pdf?

PDF To Image Converter v2.1 can convert PDF to TIF and make tif colorful one time. In PDF To Image Converter v2.1, the compression options are existed for TIFF format, so I will explain how to convertPDF to TIF and make it colorful together in the following paragraphs.

1. Launch PDF To Image Converter v2.1, and open it to its interface like below:

快照100

2. Add pdf into batch process field, click its route to preview it in preview area.

快照101

If hecking on your pdf file, you could use those icons mentioned in the picture above to preview it in details.

3. Choose your target format as TIF in “File type” menu, then type your folder location into the edit-box of “Destination field”.

快照102

4. In this step, you will get the point on how to get your tif colorful as original pdf when preparing to convert PDF to TIF. In PDF To Image Converter v2.1, for TIFF there are 7 compression mode offered users to choose. In general, the difference are on color and size :

  • None, Packbits, LZW and JPEG: colorful when true color;
  • CCITT Group 3, 4 and ClassF Fax File: black and white whatever 1,4,8 and 24 in image bit-count;

In the condition of the same image bitcount, there is no doubt that no compression will lead tif the most biggest in size; other compression format are different in size, too.

So here we choose “None” as compressed format for tif as our example, and let other options unchanged like “Auto” in the menu of “Image bitcount”, which can guarantee colorful like original pdf. To get multiple pages in one tif file, you could click the check-box of “Multiple page” in PDF To Image Converter v2.1.

5. Process its converting PDF to TIF through clicking “Convert” button, later you will get your colorful tif. Then shut down your converter.

快照104

快照105

To know more info about PDF To Image Converter v2.1, click here: https://www.verypdf.com/pdf2tif/index.htm#dl.

VN:F [1.9.20_1166]
Rating: 10.0/10 (1 vote cast)
VN:F [1.9.20_1166]
Rating: +1 (from 1 vote)
docprint pro

How to edit image comment in docPrint preview application?

You can use VeryPDF docprint preview application to add image comment on the files before you send the files to the real machine. You can also use VeryPDF docprint to edit image comment on current page in the Annotate Document dialog box.

Pretending that you have just used the image comment tool to add an image on the page in the Annotate Document dialog box, now you would like to edit image, you should do as follows:

First of all,  to check that all the buttons on the toolbar in the Annotation dialog box are with color. If not, you should click the comment button clip_image001 before you edit image comment on current page .

Then, select the image you would like to edit by clicking on the image, then the image will be marked by a red rectangle with some little circles on the border as illustrated as follows:

image

If you want to move the selected image, you can keep the left key down with the mouse and drag it to the proper place, depending on your priority.

If you want to enlarge the image, you can move the mouse to the corner of  red rectangle. When a cursor with two open arrows appears on the screen, you can keep the left key down with the mouse and drag the border of the rectangle to adjust the image to the right size you want.

If you click the right key with the mouse, then, you will see a menu appear on the screen as following. Then you can copy, delete, cut, etc. the image. If you are careful  enough, you may point out that there is no paste option on the menu. Don’t worry, you can paste the image after you copy or cut the image on  current page by pressing Ctrl + V.

360截图20111025110846937

To copy the image,  you can choose Copy  or press Ctrl+C to copy the selected image to the clipboard>click on the current page other than the image>press  Ctrl+V to paste the image> drag the image to a proper place on current page .

If you want to cut the image,  please choose Cut or press  Ctrl+X.

To delete the image,  you can choose Delete, or press Delete key on the keyboard.

If there are lots of comments overlapped on the current page and you want to set a image comment as the background, you can select Set to Background. On  condition, if you want to set the selected image comment as the foreground comment, you can choose Set to Foreground.

If you want to to make each of the new image comment on current page with the properties you have saves just now, you can choose Make Properties Default. Then, each time a new image is added, the original properties should be the saved one.

If there are several comments close together,  you may need the option Lock/Unlock  to help you edit the image by locking the rest  comment on current page.  

If you choose Properties, the Properties dialog box will appear on the screen for you to set the properties of the selected image.   On how to set the  properties, you can refer to related articles on the knowledge base of VeryPDF at the following website: https://www.verypdf.com/wordpress .

To get more information about VeryPDF docPrint, you can visit https://www.verypdf.com/artprint/index.html. You can also download the newest updated version of VeryPDF docPrint as well as the free version of other VeryPDF  software applications.

VN:F [1.9.20_1166]
Rating: 0.0/10 (0 votes cast)
VN:F [1.9.20_1166]
Rating: 0 (from 0 votes)
pdf print

Edit pdf page offsets when printing pdf documents via command line

A commonly used method of printing pdf documents is using supported GUI applications, which is not appropriate for batch printing a large number of pdf documents. If you are running a server computer and need to processing mass pdf documents with batch scripts, you must need a program running in MS-DOS mode and supporting to print pdf documents with command lines. VeryPDF PDFPrint Command Line version is the software that supports to print pdf documents with MS-DOS command line mode. This software supports almost all of the options of a physical printer, and this article is to present some description of using these options.

For using VeryPDF PDFPrint, you need to download it at https://www.verypdf.com/pdfprint/index.html or https://www.verypdf.com/pdfprint/pdfprint_cmd.zip. All the resource and components of this program is packed in a zip package, and you have to unpack it into any directory before using it. The author stored those unpacked components of the program in the directory “D:\pdfprint_cmd” for easy using and describing. In the directory that you store the unpacked resource of the program, you will see an executable file named “pdfprint.exe” that is used to be called via a command line in MS-DOS mode. This article will give some description of using the program taking the options “-xoffset” and “-yoffset” as examples.

To call the program in a command line, you have to launch your MS-DOS command prompt window of your Microsoft Windows Operating System. Follow the menu path, [start] –> [Run…] and input “cmd” or “cmd.exe” into the popup dialog of “Run”, and then you will see the MS-DOS command prompt window coming out as presented in the following screen snapshot.

image

The default current directory of the MS-DOS command prompt is “C:\Documents and Settings\USER” where the “USER” is your system account name. The author’s current directory of MS-DOS command prompt is “C:\Documents and Settings\admin”. In this directory, you can call PDFPrint with specifying the whole path of the program, “D:\pdfprint_cmd\pdfprint.exe”. For example, the command line of using the full path is as follow,

D:\pdfprint_cmd\pdfprint.exe D:\pdfprint_cmd\readme.pdf <Enter>.

This command line calls the executable program, “pdfprint.exe” stored in “D:\pdfprint_cmd\” and prints the pdf document of “readme.pdf” stored in “D:\pdfprint_cmd\”.

If you want to call the executable program without including the long path string in the command line, for easy using, you can change the current directory of the MS-DOS prompt to the one that VeryPDF PDFPrint is stored in. The following commands are for changing the current directory of the MS-DOS to “D:\pdfprint_cmd\”:

D: <Enter>
cd cd pdfprint_cmd <Enter>

After performing these commands above, the current directory will be changed to “D:\pdfprint_cmd” where PDFPrint is stored. You can directly call the program with its name of executable file without specifying its full path. A basic command line of using VeryPDF PDFPrint is like that below.

pdfprint.exe readme.pdf <Enter>

This command line will print the pdf document of “readme.pdf” using the default settings and default printer.

Options “-xoffset” and “-yoffset” are for setting the pdf page offset in horizontal axis and vertical axis, respectively. Option “-xoffset” has an argument of integer that indicates the offset in unit of point, and “-yoffset” has the same argument as “-xoffset”. The following two command lines are for two examples of using the two options:

pdfprint –xoffset 256 –yoffset 128 readme.pdf <Enter>

print pdf document of “readme.pdf” with horizontal page offset of 256 points and vertical page offset of 128 points.

pdfprint –xoffset 256 readme.pdf <Enter>

print “readme.pdf” with shifting the pdf pages with horizontal offset of 256 points.

There are more options and descriptions about VeryPDF PDFPrint at https://www.verypdf.com/pdfprint/pdf-print-cmd.html, and if you want to use the full function of VeryPDF PDFPrint, please buy a license at https://www.verypdf.com/order_pdfprint_cmd_svr.html.

VN:F [1.9.20_1166]
Rating: 0.0/10 (0 votes cast)
VN:F [1.9.20_1166]
Rating: 0 (from 0 votes)
html converter (htmltools)

How to convert html to postscript format?

PostScript,always said as PS, is a page description language developed by the Adobe corporation.The purpose of the development of Postscript is to specify how a printer should render a page of text or graphics. It is a stack-based, postfix programming language that performs calculations and draws images.PostScript files can be printed on a variety of printers or viewed on a variety of machines, always optimally using the resolution available.

As a graphic language, PostScript is basically vector-based rather than bit-mapped. Thus, it's good at drawing a square or a star, or even a filled polygonal region. But it's rather unnatural, in PostScript, to define a rectangular region in which every pixel has an assigned color. If a highly detailed bit-map image is needed, it is often computed in another format, such as GIF, and then "imported" into the PostScript file.

If you want to convert html to postscript, you can use the software HTML Converter Command Line which can be downloaded at https://www.verypdf.com/htmltools/htmltools.zip .HTML Converter Command Line is a zip file when just been loaded to your computer.You should unzip and register it,then the functions can be used without any problems.

There are some steps to convert html to postscript by HTML Converter Command Line,you can follow them.

1.Run cmd.exe

If you want to use command line application,you should run cmd.exe to input dos commands.Please click “start”,then click “run” in the menu.There will pop up a dialog box and you just need to input “cmd” in “open” edit box then click “OK” button.Please look at figure1 and figure2.

image

                                     figure1.

image

                                     figure2.

2.Write commands in.

You should writer the commands in the cmd.exe dialog box.The commands include called program,source file and target file.Please look at fiugre3.

image

                                                                        figure3.

The commands are "C:\Documents and Settings\admin\Local Settings\Temp\htmltools\htmltools.exe" "www.verypdf.com" verypdf.ps

"C:\Documents and Settings\admin\Local Settings\Temp\htmltools\htmltools.exe"   stands for the path of called htmltools.exe.

“www.verypdf.com  stands for the URL of the webpage you want to convert from html to postscript.

verypdf.ps  stands for the target file and you should name the file yourself.Don’t forget the extension name here which should be written as .ps,not .postscript.

3.Browse the target file.

The target file will be saved in C disk by default because you run the whole conversion under C dist root directory.Please look at figure4.

image

                                                                       figure4.

VN:F [1.9.20_1166]
Rating: 0.0/10 (0 votes cast)
VN:F [1.9.20_1166]
Rating: 0 (from 0 votes)