Well, if you have a good document converter like , this problem can easily be solved. In this article. I would like to take VeryPDF docPrint Pro as an example to show you how to use an all to all document converter to convert Excel to PCX image. I found docPrint Pro at https://www.verypdf.com two months ago, and now I am really enjoy using it.
Step1: Run docPrint Pro.
Step 2: Set options.
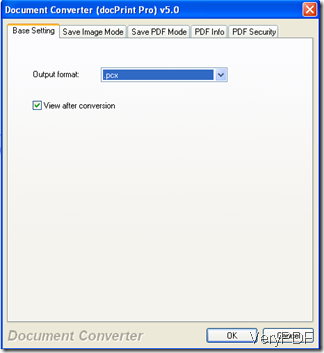
1 Press “Setting”, we will see a new panel as below:![]()
![]()
2 Select “.pcx” on the drop-down menu of “output format”.
Moreover, you can choose to view or not to view the image after conversion by click on the checkbox on the left of “View after conversion”.
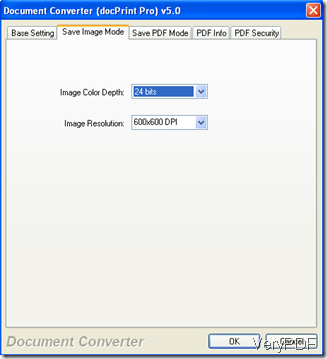
When you need to change the pixel, go press on “Save Image Mode”, then you will see the panel as below. Select the proper option on the drop-down menu beside “Image Resolution”. You can also change the color depth on the same panel. After you have set all the option, don’t forget to click on “OK” .
3 Conversion
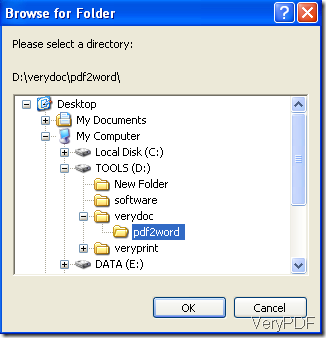
Press “Start”, you will see a prompt as following:
Select a directory to save the PCX image, and press “OK”. The computer will start converting. The process will finish in seconds. When the icon of this software which looks like a printer disappear from the taskbar in the left-down corner of your computer, the PCX image will appear in your computer.


