image to pdf converter

How to combine many files into one PDF file?

    We  often need to combine lost of files into a single document, regrettably, the PC always shows them by creating a presentation. Say you receive a lot of files from different people, and these files are in different file formats, some are Word documents, some are PDF files and others are images, but you need to combine these multiple files to a single PDF document then classify them by date or by senders. How should you do? Adobe Acrobat  only can combine PDF files together. Any software can tackle this matter? Absolutely yes.

I can combine many files into PDF file, but I need a software-Image2PDF v3.2, as its name shows that it can convert nearly all formats images into PDF file. But you many wonder that my files are not single images, there are still word documents and Excel tables.How can I use this software? You can open those files then make the screenshots of them then you can convert all the screenshots  to PDF files. If you feel my way is reachable, you can have a try.

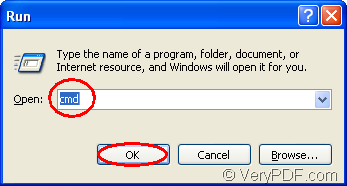
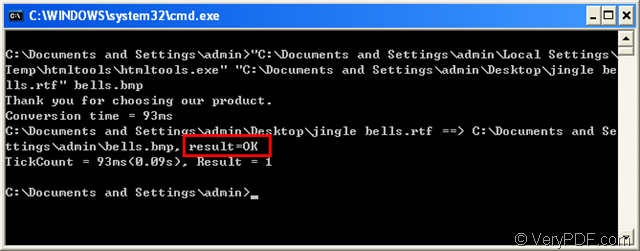
  • Download this software here: https://www.verypdf.com/tif2pdf/tif2pdf.htm#dl  When you see a “img2pdf.exe”package, please save it, unzip it and let it run in your PC. Then you can use this software in your computer.
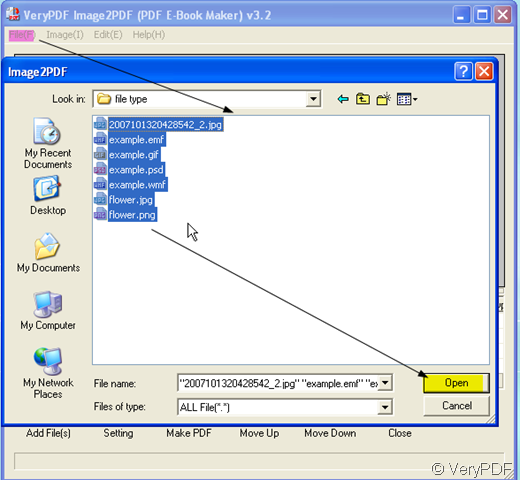
  • Add all your files to Image2PDF. Please ignore image formats, because it nearly supports all such as IF, TIFF, JPG, JPEG, GIF, PNG,and so on. You have many ways to add files, I only show one of them. Click “File” at the top menu list then click “Add file” then you will enter the following dialog box. You can choose the files you want to be converted.

Snap1

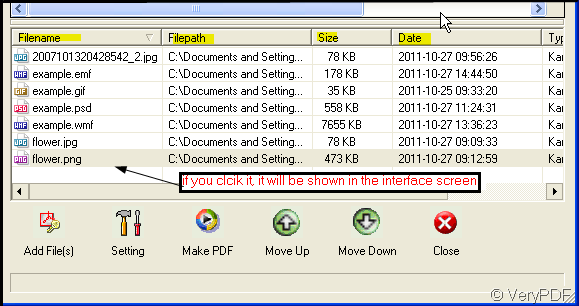
  • After choosing files, each file details will be shown in each blank.If you click it, it will be shown in the interface screen.

Snap2

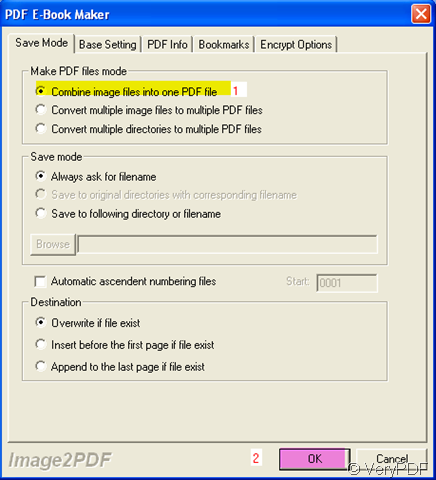
  • Then you can set the restriction at “Setting” if you want to combine them into one PDF file. Choose the option in yellow then click “OK

Snap3 

  • When you finish the choosing, please click the button “ Make PDF” , name the PDF file and choose the folder to save it. In a second, you will get a PDF file with all the images.

Snap4

VN:F [1.9.20_1166]
Rating: 0.0/10 (0 votes cast)
VN:F [1.9.20_1166]
Rating: 0 (from 0 votes)
docprint pro

How can I change the location of page number in docPrint preview application?

As a document converter, VeryPDF docPrint allows you to convert any printable document to 50+ graphics; as a Windows printer driver,  VeryPDF docPrint enables you to  preview the file, edit the file before sending the file to a real printer. In the  VeryPDF  docPrint Preview application, you can add page number on your documents, put the page number at the top center of a page, or right bottom of a page, change the location of page number from left top to left bottom, etc.

The following example shows you a PDF file with four pages and without page numbers. This article will take it as an example to  show you how to change he location of page number.

image

Step 1: Add page numbers on the pages

1.1 Open the Option Settings dialog box.  If you can find the Option Settings dialog box,  skip to1.2; otherwise click View  in the docPrint window> choose Show/Hide Options to open the Option Settings dialog box.

1.2 In the Page Number combo box , select any option on the drop down menu except None.

The second combo box is titled Page Number.

image

There are seven options listed on the drop down menu of the Page Number combo box. The first one None is used to delete the page number you have added on current document. You can used anyone of  the rest options in the Page Number combo box to put the page number on the corresponding place.

360截图20111027150110546

Here we choose Left Top as an example, then the page number will appear on the left top of each page.

image

Step 2: change the location of page number.

You can select another option on the drop down menu of the Page Number combo box, other than Noun and Left Top. Here we choose Right Bottom for instance. Then, we will find the page number appear on the  right bottom of each page.

image

By choosing different option in the Page Number combo box, you can freely change the location of page number you add on your document.

To learn more about how to use  docPrint, you can read articles at https://www.verypdf.com/wordpress. If you want to get more information about VeryPDF docPrint,  please visit https://www.verypdf.com/artprint/index.html.

VN:F [1.9.20_1166]
Rating: 0.0/10 (0 votes cast)
VN:F [1.9.20_1166]
Rating: 0 (from 0 votes)
html converter (htmltools)

How to convert rtf to bmp?

RTF is short for Rich Text Format.RTF is a data format for expressing text documents. It is not really a markup language, as it was never meant for intuitive and easy typing.RTF files are provided on a website so you can get immediate access to the information. They can be saved on your computer and viewed with any word processor, including Wordpad, Notepad, Word and Star Office. The files are named so that they end with the file extension .rtf.

Some people want to convert rtf to bmp(bitmap) format but don’t know how to do and what kind of software should use.Don’t worry,this article will help you to resolve this problem.

You can convert rtf to bmp with the software HTML Converter command line.It allows you to create previews or thumbnails of web pages in a number of different formats, such as TIF, TIFF, JPG, JPEG, GIF, PNG, BMP, PCX, TGA, JP2 (JPEG2000), PNM, etc. It also allows you to convert web pages to PDF, PS (postscript), WMF, EMF vector formats.

The command line application of HTML Converter is convenient with its easy to learn command lines.

You can learn the steps to convert rtf to bmp format in following contents.

First,you should run cmd.exe program.There are two method to do this job.

Method 1.Click image button and click “run” in the menu,in popup dialog you should input “cmd” in “open” edit box.Then click “OK” button.Please see Figure1.

image

                                 Figure1.

Method 2.You can press “Windows” + “R” to open the same dialog showed in Figure1,then do the same operation.

Second,in popup cmd.exe dialog box,please input command lines.The commands should include called program,source file and target file.Please see Figure2.

image

                                                                         Figure2.

The whole commands are "C:\Documents and Settings\admin\Local Settings\Temp\htmltools\htmltools.exe" "C:\Documents and Settings\admin\Desktop\jingle bells.rtf" bells.bmp

"C:\Documents and Settings\admin\Local Settings\Temp\htmltools\htmltools.exe"  stands for the path of called program—htmltools.exe,the executable file of HTML Converter Command Line.

"C:\Documents and Settings\admin\Desktop\jingle bells.rtf"  stands for the path of source file.

bells.bmp  stands for the name of target file,including file name and extension name.

NOTE:There is no information about the path of target file in command lines.The target file will be saved in current directory by default.If you specify the directory for the target file,it will be saved in the location you have set.

Third,find the target file in current directory.Please see Figure3.

image

                                                                        Figure3.

The two figures below are the source file and target file.Please see Figure4 and Figure5.

image

                                                                 Figure4.(source file)

image

                                                                  Figure5.(target file)

VN:F [1.9.20_1166]
Rating: 0.0/10 (0 votes cast)
VN:F [1.9.20_1166]
Rating: 0 (from 0 votes)
pdf to image converter

I want to convert the 2nd page of pdf to pcx, how to make pcx more clear?

It is simple to convert pdf to pcx and make it more clear in PDF To Image Converter v2.1. For more info of PDF To Image Converter v2.1, you could visit this page: https://www.verypdf.com/pdf2tif/index.htm#dl.

Here is the solution about your question:

  • Put your pdf into PDF To Image Converter v2.1: click “Add” button>get a window pop out>double-click your pdf file, then the route of your pdf could be under “PDF File”.
  • Look over on your pdf carefully: click this route>your pdf appear on the panel, check on it with using series of icons above its preview picture.
  • Choose your target format: click the edit-box of “File type”>select PCX.
  • Prepare a folder for your pcx: click the edit-box of “Destination folder”>input your folder route ,or just click “Browse” button>get a pop window>select a folder>press down “ok”.
  • If you want to convert just one page pdf to pcx, you may need to use the functional area of “Page range”: click its check-box>type 2 into the edit-box of “From” and “To”, this could guarantee that users get the 2nd page converted into image.
  • Likely, to get your pcx more clear, in PDF To Image Converter, please concentrate on the functional field of “DPI”. before we set the parameters, we need to know what is DPI roughly.

DPI means dots per inch, it is used to represent the resolution of image, which describes the detail an image holds and applies to raster digital images, film images, and other types of images. Higher resolution means more image detail. Here based on image, DPI is related to some output such as printers and scanners etc..

So you may conclude that the greater your DPI is, the more clear your raster image is, along with the bigger size and dimension absolutely. so here click the edit-box of DPI>input a larger number in them, as you know, this is the guarantee your image is a clear raster image. Here we input 222.

  • Process this task based on converting pdf to pcx in PDF To Image Converter v2.1: click “Convert” button, then shut down this converter, your converting is complete.

快照184

快照185

VN:F [1.9.20_1166]
Rating: 0.0/10 (0 votes cast)
VN:F [1.9.20_1166]
Rating: 0 (from 0 votes)
verypdf blog

How to convert pcl to bmp?

Documents stored in PCL (Printer Command Language) are not appropriate for sharing or publishing on the Internet, so a converter tool for converting pcl to others formats is always required. This article is to introduce VeryPDF PCL converter, a program of converting pcl to bmp. PCL Converter is a powerful program for converting most printer spooling files, like pcl, pxl and px3, to other commonly used formats, like bmp, pdf, jpg. VeryPDF PCL Converter has both GUI (Graphical User Interface) and command line versions, and this article is mainly about the GUI version.

You can download the installer of PCL Converter at https://www.verypdf.com/pcltools/pcl-converter.exe, and install the program into your Microsoft Windows System. After the installation, follow the menu path, [start] –> [All Programs] –> [VeryPDF PCL Converter v2.0] –> [VeryPDF PCL Converter v2.0], to start the program GUI. You can press the “Try” button to evaluate the program before buying a license for it. The main window of the program is presented in the next screen snapshot.

image

Before converting your documents of pcl to bmp, you have to add these pcl files into the file list of the main window. Here are the four paths to add those files into the file list.

  1. In the main window of PCL Converter, follow the menu path [File] –> [Add Files], and browse to and select those files in the popup dialog box of Windows file picker.
  2. In the main window, follow the menu path [File] –> [Add Directory], and browse to the directory where those files are stored in.
  3. In the main window of VeryPDF PCL Converter, press the button of “Add File(s)”, and then browse to the files in the Windows file picker dialog.
  4. Drag those files from the window of Windows Explorer and drop them into the file list of the main window of PCL Converter.

The next step is to set the conversion parameters in the setting dialog box. The two ways to activate the setting dialog are as follows.

  1. Follow the menu path, [File] –> [Settings].
  2. Press the button in the main window of PCL Converter.

image

The setting dialog is titled with “VeryPDF PCL Converter 2.0”. In the tab of “Base Setting”, choose the target format of “.bmp” in “Output format” dropdown list, select “0” (no rotation) in “Rotate angle” dropdown list, choose “A4” for paper type in “Page Size” dropdown list, select “Portrait” radio button in the group box “Page Orientation”, and press “OK” button to complete the setting for converting pcl to bmp.

Now come to the main window of PCL Converter, press the button of “Start” and choose a directory in the dialog box of “Save As” for storing the converted target files. PCL Converter will convert the selected files in the file list from pcl to bmp. It will as well convert those files not in pcl from pxl to bmp or from px3 to bmp.

The above words simple described the usage of PCL Converter for converting pcl to bmp. You can buy a license for your software at https://www.verypdf.com/order_pcl2pdf_end.html and get more information at https://www.verypdf.com/pcltools/pcl-tools-help.htm.

VN:F [1.9.20_1166]
Rating: 0.0/10 (0 votes cast)
VN:F [1.9.20_1166]
Rating: 0 (from 0 votes)