html converter (htmltools)

How to convert format emf to png in a command line?

You can choose many kinds of software to convert the file of emf to png format file.One of the software is VeryPDF HTML Converter Command Line which can be downloaded at the site https://www.verypdf.com/htmltools/htmltools.zip.VeryPDF HTML Converter Command Line is a powerful HTML conversion product. It allows you to create previews or thumbnails of web pages in a number of different formats, such as TIF, TIFF, JPG, JPEG, GIF, PNG, BMP, PCX, TGA, JP2 (JPEG2000), PNM, etc.Command line application can be called from within ASP, VB, VC, Delphi, BCB, Java, .NET and COM+ etc. program languages. It uses advanced techniques to allow efficient asynchronous multithreaded operations.

Just run your cmd dialog box by clicking “start” – “run” ,input “cmd” in “open” edit box.Then click “OK” button.Please look at figure1.

image

                                     figure1.

Then you can start your conversion.You should find an emf format file in your computer first.Then you can input the commands in cmd dialog box.Please look at figure2.

image

                                                                              figure2.

The commands are "C:\Documents and Settings\admin\Local Settings\Temp\htmltools\htmltools.exe" "C:\Program Files\docPrint Pro v5.0\blank2.emf" blank.png

"C:\Documents and Settings\admin\Local Settings\Temp\htmltools\htmltools.exe"  means the path of htmltools.exe.

"C:\Program Files\docPrint Pro v5.0\blank2.emf"  means the path of emf source file.

blank.png  means the name and extension name of target png file.

The target png file will be saved in the path “C:\Documents and Settings\admin” because the conversion just finished runs in the same directory.Please look at figure3.

image

                                                                           figure3.

Then you can open the file by some kind of viewer which can open png format files after the conversion of image of emf to png files.

VN:F [1.9.20_1166]
Rating: 1.0/10 (1 vote cast)
VN:F [1.9.20_1166]
Rating: 0 (from 0 votes)
pdf to image converter

What will happen for converting pdf to png if we choose different mode in image bitcount?

In “Image bitcount”, there are 5 types of mode which are “1”, “4”, “8” and “24”= “Auto”. Now we will introduce them to you with more details.

Bit-count is based on raster image:

  • 1, the most poor quality in color—black and white, with the smallest size;
  • 4, better than 1 in color with bigger size than 1;
  • 8, better quality than 4 in color, bigger than 4 in size, or gray scale image;
  • 24, true color, the most qualified in color as 32, bigger size than 8;

There are other values like 16 etc., for the modes we listed above are set in PDF To Image Converter v2.1, so next we will know what will happen if we choose different bit-count when we converting pdf to png.

1. Press down add  to add your pdf into PDF To Image Converter v2.1 and check on it with preview icons, also you can print your pdf by clicking print .

2. Select “File type” as PNG and give your png a folder in “Destination folder”.

dib1

3. Keep “TIFF” and “PDF” fields in default setting in “Option”. To get bigger dimensional image, you can increase the value in “DPI”. To make the second page pdf converted, input 2 in “From” and “To” after activating “Page range”.

4. Image bitcount is the point of your answer. You can try 1, 4, 8, 24 and Auto successively with clicking “Convert” button, by the way, you should change its name when you get your png images at first time, or the next images in different mode will be replaced for each other. Here are the figures:

dib2 

dib3

dib4

dib5

dib6

dib8

If wanting to know more on PDF To Image Converter v2.1 and try it:https://www.verypdf.com/pdf2tif/index.htm#dl; https://www.verypdf.com/pdf2tif/pdf2image.exe.

VN:F [1.9.20_1166]
Rating: 0.0/10 (0 votes cast)
VN:F [1.9.20_1166]
Rating: 0 (from 0 votes)
docprint pro

How to add rectangle comment on the current page in docPrint preview application?

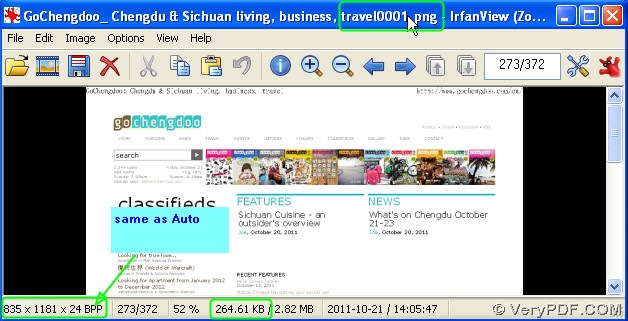
Verypdf docPrint supports you to add comment on the current page including to add rectangle comment, text comment, etc. When you preview the page in VeryPDF docPrint  dialog box, you can  add rectangle comment on the selected page by using the “Add Comments on Current Page”  option . Moreover, you can highlight the text bounded by the rectangle. As you can see on the following screenshot, there are four kinds of rectangle comment on the page: the first one is the original rectangle set by default; the second one is with bold frame and is filled with semi-transparent color. The third one has dotted frame, and the filled color and frame color of the last one are different from the second one.

image 

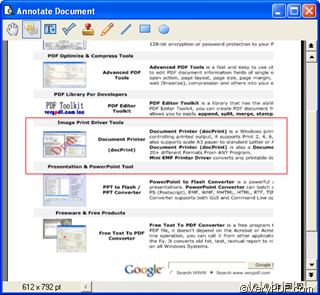
The rest of this article will show you how to add rectangle on a page in Verypdf docPrint preview application step by step. In case some readers are the first time to use Verypdf docPrint which one can download from https://www.verypdf.com/artprint/index.html , we will begin from the very beginning:

1 Open the file you want to add comment.

2 Run Verypdf docPrint

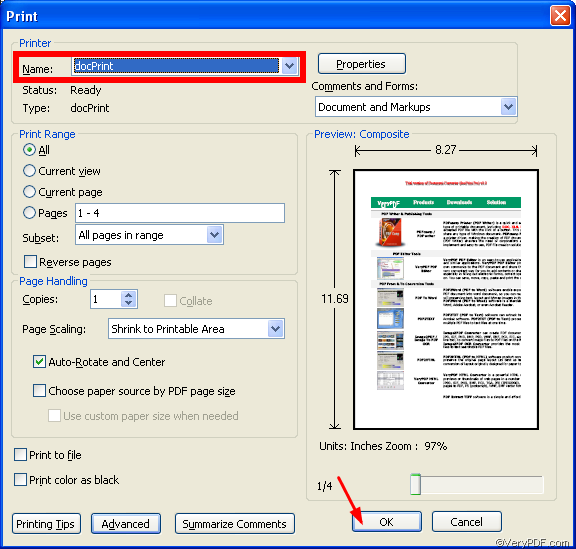
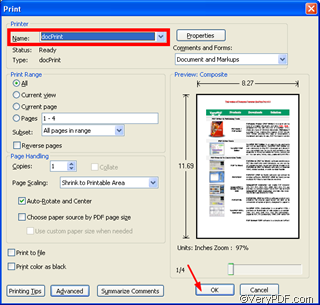
Press “Ctrl+P” >select “docPrint” as the “name” of the printer in the “Print” dialog box >press OK to open the “docPrint” dialog box.

image

image

3 Open the “Annotated document” dialog box

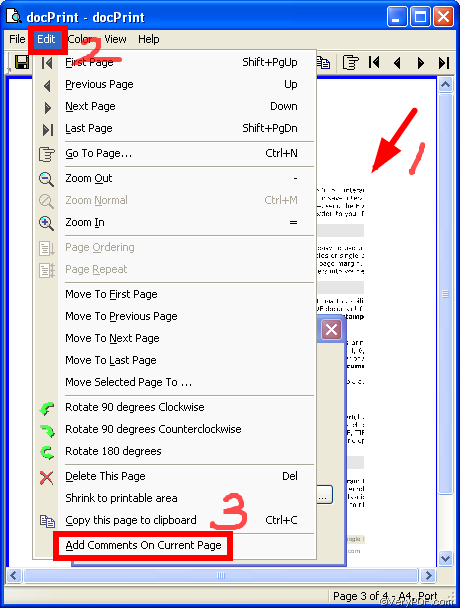
Remember to select the page you want to add comment and click on it, otherwise the computer don’t know which page is the one you want to add comment >Click  “Edit” on the toolbar>Click  “Add Comments on Current Page” on the drop down menu to open the“Annotated document”dialog box

image

image 

4 Trigger the comment buttons on the “Annotated document” dialog box

As you can see on the “Annotated document” dialog box illustrated above, there are nine buttons on the tool bar, the last seven button of which are comment buttons. The initial color of the comment buttons is gray, which means that you cannot add comment on the current page before you trigger these comment buttons. The following image illustrates the buttons:

image 

Now you should click the second button to trigger the comment buttons. .When these buttons become from gray to colorful, it means you can use them to add comment. The following image shows you the buttons after you click the second button

image

5 Add rectangle on the current page

Click the “Add Rectangle comment” buttonimage  >keep pressing the left button with the mouse and drag a rectangle wherever you like on the page in the “Annotated document” dialog box.

Then a rectangle as illustrated below will appear on the page.

image 

6 Modify the rectangle

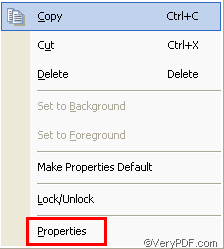
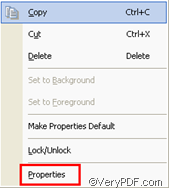
Select the rectangle by click the frame of it>when the frame become like the following example, right click with the mouse>choose “Properties”o open the  “Properties” to open the “Properties” dialog box

image

image 

image

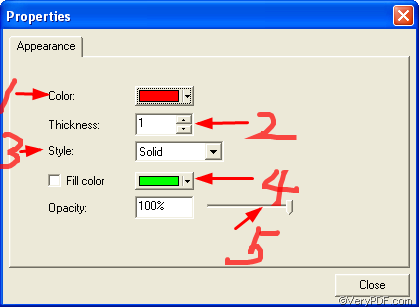
  1. Choose your favorite color for frame in the first combo box. Here I would like to choose red as the frame color.
  2. Specify the proper number as the thickness of frame. The numbers of thickness range from 0 to 12 . the bigger the  number, the bolder the frame. For instance, here I choose “12”。
  3. Set frame style by selecting the proper one in the combo box. “Solid”means frame with real lines; “Dashed1” to “Dashed 4” mean frames with different kinds of dotted lines. Here I choose “Dashed 1”
  4. Click on the “Fill color” check box to fill color in the rectangle. You can a proper color in the combo box next to “Fill color”. Here I select green as the fill color
  5. To make the fill color to be transparent, you should drag the control button to the left to decrease the the “Opacity” rate. as the “Thickness”. Here I set 49% as the the opacity.

After you set all the options, click “Close” to close the “Properties” dialog box. you can find a  rectangle as illutrated below.

image 

To read more articles on how to add comment on the current page via VeryPDF docPrint, please go to visit  https://www.verypdf.com/wordpress

VN:F [1.9.20_1166]
Rating: 0.0/10 (0 votes cast)
VN:F [1.9.20_1166]
Rating: 0 (from 0 votes)
html converter (htmltools)

How to convert format emf to bmp in a command line?

If you want to convert an image of emf to bmp file,you can use VeryPDF HTML Converter Command Line which you can download at https://www.verypdf.com/htmltools/index.html .VeryPDF HTML Converter Command Line is a zip file when you finished loading.You should unzip the file,and the software can be used then.But you should register the software first,or the functions will be limited.

How to register?

Please run your cmd first.Click “start” – “run” ,in edit box you should input cmd,then click “OK” button.Please look at figure1.

image

                                                      figure1.

Then you will see a cmd.exe dialog box.You should find the location of your VeryPDF HTML Converter Command Line.Open the file and copy the path in “address” combo box.Change the path of running path in cmd.exe as the one you have just copied.The command is

                            cd “the copied path”

Please look at figure2.

image

                                                                    figure2.

When you buy the software VeryPDF HTML Converter Command Line,you will get a register code.You should copy the and paste the code in current cmd dialog box.Then you can use VeryPDF HTML Converter Command Line without any limitation.

VeryPDF HTML Converter Command Line can help you to convert emf to bmp files and there are two converting methods you can follow.

Method1.Call the program in the directory which is not the installation directory of htmltools(the executable file of VeryPDF HTML Converter Command Line ).

image

                                                                          figure3.

In figure3,the command is "C:\Documents and Settings\admin\Local Settings\Temp\htmltools\htmltools.exe"  "C:\Program Files\docPrint Pro v5.0\blank.emf" blank.bmp

"C:\Documents and Settings\admin\Local Settings\Temp\htmltools\htmltools.exe"  stands for the path of  VeryPDF HTML Converter Command Line .

"C:\Program Files\docPrint Pro v5.0\blank.emf"  stands for the path of source file.

blank.bmp stands for the name of target file which will be stored in C disk.

Method2. Call htmltools in its installation directory.

image

                                                                          figure4.

In figure4,the command is cd "C:\Documents and Settings\admin\Local Settings\Temp\htmltools", click “enter” button.Then htmltools "C:\Program Files\docPrint Pro v5.0\blank.emf" blank.bmp

cd "C:\Documents and Settings\admin\Local Settings\Temp\htmltools" means change the current path to the location where VeryPDF HTML Converter Command Line is installed.

htmltools "C:\Program Files\docPrint Pro v5.0\blank.emf" blank.bmp.In this command,htmltools means the name of called software, "C:\Program Files\docPrint Pro v5.0\blank.emf" means the path of source file,blank.bmp means the name of target file which will be stored in the same folder with called software.

Converting file of emf to bmp file is very easy by using VeryPDF HTML Converter Command Line.

VN:F [1.9.20_1166]
Rating: 0.0/10 (0 votes cast)
VN:F [1.9.20_1166]
Rating: 0 (from 0 votes)
pdf to image converter

We want to convert pdf to tif and can it be compressed as packbits?

If you want to convert pdf to tif and compress tif as packbits, you should choose PDF To Image Converter v2.1 where there are many options for converting pdf to image and almost all compression format that offered for users. If you are interested in PDF To Image Converter v2.1, you can visit this page: https://www.verypdf.com/pdf2tif/index.htm#dl; to download PDF To Image Converter v2.1, click this link: https://www.verypdf.com/pdf2tif/pdf2image.exe.

Now that you mention compression format, here we should know how to judge whether tif is compressed or not according to tif tag:

Compression TAG
Tag = 259
Type = short
N=1
DefaultValue=1

  • Value=1 no compression;
  • Value=2 CCITT Group 31;
  • Value=3 CITT Group 3 Fax T4;
  • Value=4 CITT Group 3 Fax T6;
  • Value=5 LZW;
  • Value=6 JPEG;
  • Value=32773 PackBits;

Here we start to introduce how to convert pdf to tif with packbits in PDF To Image Converter v2.1.

Step1. Preview your pdf with clicking open and check on it with preview icons(to print it, clickprint ).

Step2. Add its route into “PDF File”, you will see the number of pages in pdf under “Page Count”, which will make an effect in “Page range”.

Step3. Make your target file format as tif and select a folder for your tif in “Destination folder”.

Step4. To want to make your tif more suitable for printer, you can enlarge its dimension in “DPI” via setting greater value like 200 or 300.

Step5. To get all pages converted to tif, activate “Page range”, input 1 and 2 into “From” and “To” so that we can get the 1st and the 2nd pages converted for there are 2 pages in pdf file.

Step6. We think this step is the most important for you, you should click “Packbits” option, also there are lots of options for compression, such as CCITT G3, G4, LZW, JPEG and ClassF Fax File. To make all single tif in one file, click “Multiple page”.

Step7. Keep “Auto” in “Image bitcount” with no modification in “Quality”so that we can get the most colorful image in PDF To Image Converter v2.1(or you can select other options in this menu to get different result such as “8” that determine images to grayscale(click “Grayscale”) or not.

Step8. Convert your pdf to tif at last.

packbits

VN:F [1.9.20_1166]
Rating: 0.0/10 (0 votes cast)
VN:F [1.9.20_1166]
Rating: 0 (from 0 votes)