docprint pro

How to convert Excel to TIF image?

There are various ways to convert Excel to TIF. The simplest way is to use an all-to-all converter like VeryPDF docPrint Pro to convert Excel document to TIF image. In this article I will tell you how to convert Excel to TIF with DOS.

Step 1:Run DOS

Press “Start”>>select “Run”

>>input “cmd” to run DOS

image

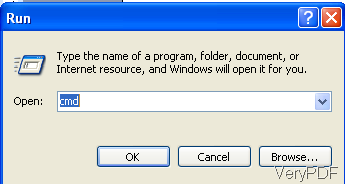
Then, you will see a prompt as follows:

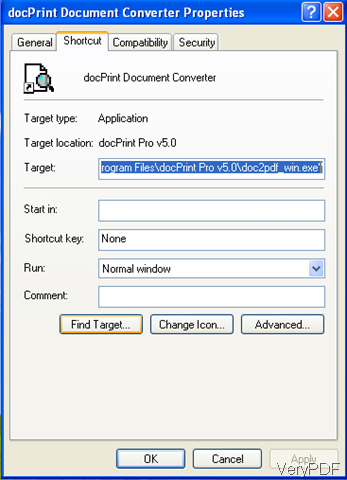
Step 2:Drag docPrint Pro to DOS

If docPrint Pro is on the desktop, you have to find its target location. You can do as following: Right-click on the icon of docPrint Pro with the mouse>>select “Properties” on the menu,

>> Then, you will see the prompt as below. Press “Find Target” >>press “OK”

image

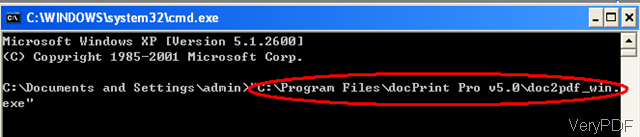
>>Your computer will find the target automatically. Drag the program into DOS, the directory will present in DOS. >> click in DOS and press “Blank” key on your keyboard

image

Step 3: Input Excel file

Drag the Excel file you want to convert to DOS

>>remember to click in DOS and then press “Blank” key

Step 4:Output TIF file

Drag the mentioned Excel to DOS again, and change the extension name from .xls to .tif.

image

before change

image

after change

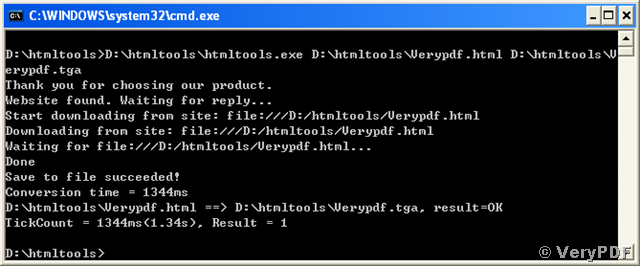
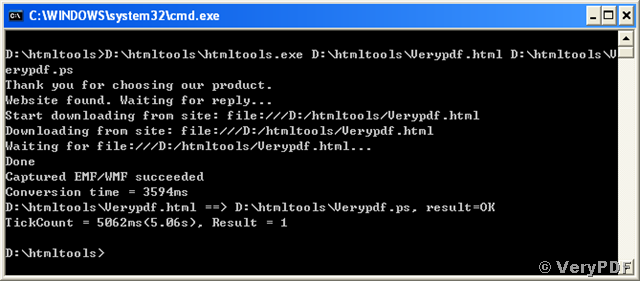
Step 5: Press “Enter” key.

The conversion will finish in seconds.

VN:F [1.9.20_1166]
Rating: 0.0/10 (0 votes cast)
VN:F [1.9.20_1166]
Rating: 0 (from 0 votes)
pdfcamp printer

What is the option to automatically display PDFs after creation? can you show me how it works?

After converting documents to pdf file,you must want to check the file to see whether it is perfect or not. But it’s a little inconvenient to find it in the location you have just set.Don’t worry,PDFcamp Printer will help you to do this more easier.In another word,you can browse the generated pdf file automatically after printing.

If you don’t have PDFcamp Printer in your computer,you should load one first and the download website is https://www.verypdf.com/pdfcamp/pdfcamp_setup.exe.

Now PDFcamp Printer will show you the methods.

First,of course you should open a document you want to print,such as word,excel,powerpoint and so on.Then click “file”—“print” or right click the blank and click”print” or use the hot key”Ctrl”+”P” directly.This is the beginning of the whole procedure.

Second,you should click “properties” in which click “save as”—“view after creation”,the most important button for this function.It means you can browse the pdf file automatically after printing.Then click “ok”.

image

Third,rename or name the created file,select the path and save.

All work have been finished and you can see an automatically popping up window which is the new pdf file.With the help of PDFcamp Printer,do you think it’s more easier?I think so.

VN:F [1.9.20_1166]
Rating: 0.0/10 (0 votes cast)
VN:F [1.9.20_1166]
Rating: 0 (from 0 votes)
html converter (htmltools)

How to convert a document of html to tga image?

TGA (Truevision Graphics Adapter) is a raster graphics image format designed by Truevision Inc, which is also equal to TARGA (Truevision Advanced Raster Graphics Adapter). This format was created for high display quality demanding devices such as Truevision graphic display cards. Because those graphic cards are usually used for professional image processing and video editing, the resolution of a TGA image matches those of NTSC and PAL. TGA format supports image storing in 8, 16, 24 and 32 bits colors. The compressing method of TGA works poorly for image with many color variations, such as photos, but performs well for simpler images and textures. TGA format is free of patent affairs and easy to use, so it is widely used in the digital image storing such as storing textures of computer game objects. The extension names for the format are “tga” and “tpic” and the frequently used one is “tga”.

Here are the guides for you to convert a document of html to tga image using the tool VeryPDF HTML Converter Command Line. Use these commands as below in your MS-DOS command prompt window and you will get your document converted from html to tga.

D:\htmltools\htmltools.exe D:\htmltools\Verypdf.html D:\htmltools\Verypdf.tga <Enter>.

Of the command lines, “D:\htmltools\htmltools.exe” is calling the conversion tool and “D:\htmltools\Verypdf.html” specifies the path and name of the source document. “D:\htmltools\Verypdf.tga” determines the output file path, name and format for the conversion from html to tga.

The whole process is shown in the following screen snapshot:

image

The last snapshot presents a part of the target image converted from html to tga.

image

VN:F [1.9.20_1166]
Rating: 0.0/10 (0 votes cast)
VN:F [1.9.20_1166]
Rating: 0 (from 0 votes)
pdfcamp printer

How to create the PDF file with custom page size?


image

Many paper size standards conventions have existed at different times and in different countries. Today there is one widespread international ISO standard (including A4, B3, C4, etc.) and a localised standard used in North America (including letter, legal, ledger, etc.). The paper sizes affect writing paper, stationery, cards, and some printed documents. For example,if you are an architectural designer,you will use A0 or A1 often.If you are a writer of a thesis,you should print it with A4 paper.

But if all the paper sizes are not suitable,I think the best way is to set the paper size yourself.PDFcamp Printer supplies this function when you print documents to pdf files.

Creating pdf file with custom page size means you can set the page size yourself by changing the width and height of page.I will show you how to do by PDFcamp Printer.

Step1.Press “file”—“print” or press “Ctrl”+”P”,then click”properties” to set all parameter.

image

Step2.Click”page setup” and find “custom”item to input the number of width and height to make sure the paper size.Then click “ok”.

image

Step3.Name or rename your file and find a suitable location to store your file,then click”save”.

image

If you have done all the steps above,you can see the new pdf file with the paper size set by yourself with the help of PDFcamp Printer.

VN:F [1.9.20_1166]
Rating: 0.0/10 (0 votes cast)
VN:F [1.9.20_1166]
Rating: 0 (from 0 votes)
html converter (htmltools)

How to convert html to ps format?

A ps (postscript) format is an image format that contains the controlling code for a postscript interpreter. Postscript describes the parameters for created images and make sure the display effects remain unchanged on different printing devices. PS format is widely used for high publication quality. A ps image file encapsules all required elements including fonts, text, graphics and controlling codes in one file, for presenting an invariable image effect. PS format stores image in vector and supports multiple pages in one single file.

You can save a document of html as a ps image via converting html to ps. With easy operations, the tool VeryPDF HTML Converter Command Line can convert your document of html to ps for you. In the MS-DOS command line prompt window, you can just type these commands:

D:\htmltools\htmltools.exe D:\htmltools\Verypdf.html D:\htmltools\Verypdf.ps <Enter>,

where “D:\htmltools\htmltools.exe” calls the conversion tool, “D:\htmltools\Verypdf.html” points to the source document and “D:\htmltools\Verypdf.ps” specifies the output file path “D:\htmltools\”, the name “Verypdf” and the conversion target format “ps”.

The whole process of the conversion from html to ps can be looked up from the following screen snapshot.

image

The converted image is stored in vector mode which will keep the image quality and support theoretically indefinite lossless scaling. The coming snapshot shows that the clarity and quality of the image is not degraded with graphic scale multiplied.

image

VN:F [1.9.20_1166]
Rating: 0.0/10 (0 votes cast)
VN:F [1.9.20_1166]
Rating: 0 (from 0 votes)