html converter (htmltools)

How to convert a document of html to wmf?

WMF, Windows MetaFile, is an image format in Microsoft Windows operating systems, which is dependent on the Windows Graphics Device Interface. WMF format natively supports the series applications of Microsoft Office, such as Microsoft Word, Microsoft PowerPoint, etc. The digital images are stored in vector mode with color depth of 16-bit. EMF is an upgraded version of WMF, Enhanced MetaFile, having a 32-bit format and more commands than WMF. There are also some compressed versions of WMF, such as Compressed Windows Metafile (WMZ) and Compressed Windows Enhanced Metafile (EMZ).

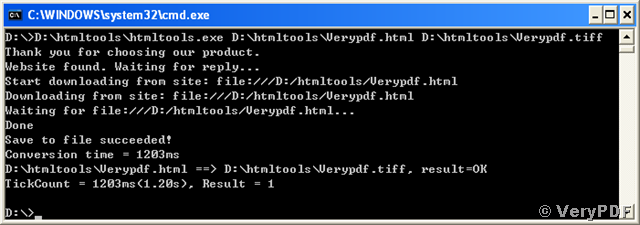
This article presents a method of converting a document of html to wmf using VeryPDF HTML Converter Command Line running in MS-DOS command prompt mode. The basic commands are similar as the follows:

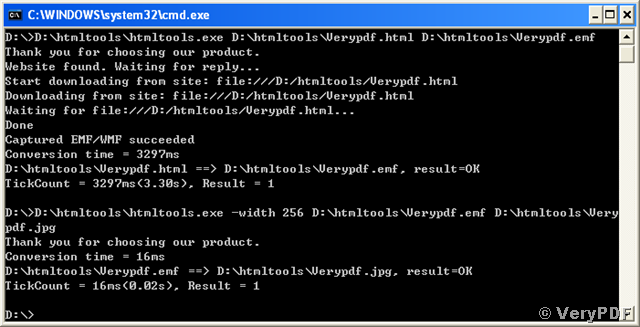
D:\htmltools\htmltools.exe D:\htmltools\Verypdf.html D:\htmltools\Verypdf.wmf <Enter>.

The command “D:\htmltools\htmltools.exe” calls the conversion tool, “D:\htmltools\Verypdf.html” indicates the path and name of the source document of html. The output file path, name and target format is given in “D:\htmltools\Verypdf.wmf” for the conversion from html to wmf.

The whole process is as provided in the following screen snapshot:

image

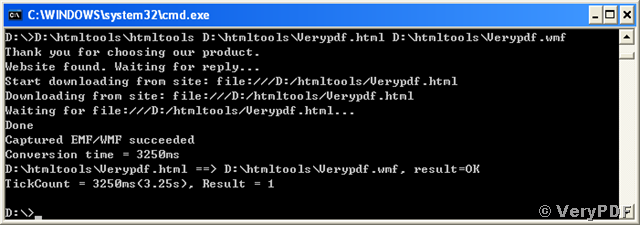
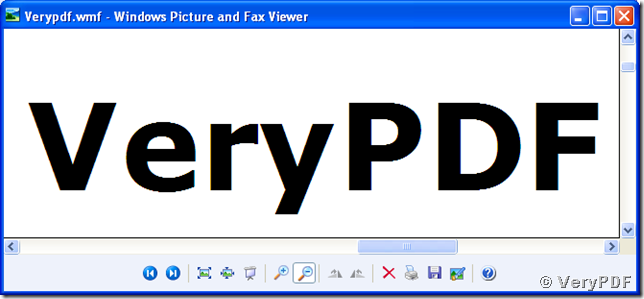
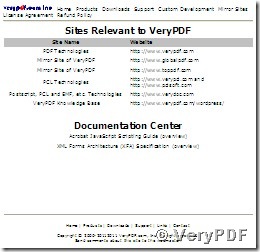
The converted image of wmf is stored in vector and supports theoretically indefinite scaling. The screen snapshot presents a mall part of the converted image from html to wmf that does not lose any image quality and clarity.

image

VN:F [1.9.20_1166]
Rating: 0.0/10 (0 votes cast)
VN:F [1.9.20_1166]
Rating: 0 (from 0 votes)
pdf editor

How to set the location in which I want to write when I modify in a pdf file?

When you edit in a PDF format file by use of verypdf pdf editor, though you can write, you find that you can’t write in the right location as you wish.The reason is your carelessness, when you click the “T+”icon in the toolbar of verypdf pdf editor,the cursor will become an image of human’s hand with a holding posture, simultaneously there is a new cursor on the left of the image. next I set a example for the instruction, look at the illustration below.

image

The new cursor is the location when you write, where you put it, where your character is, look at the illustration below:

image


VN:F [1.9.20_1166]
Rating: 0.0/10 (0 votes cast)
VN:F [1.9.20_1166]
Rating: 0 (from 0 votes)
html converter (htmltools)

How to convert a document of html to tiff image?

TIFF, Tagged Image File Format, also called TIF, is an image format designed by the company Aldus and now with rights controlled by Adobe System. TIFF is popularly accepted by graphic artists, photographers and publishers. TIFF contains most of the image information within header tags, such as size, compressing schemes, definition, etc. TIFF allows for a more flexible set of header information. It contains not only the tags of elementary information for an image file but also tags of information of copyright, and even customized tags accessible by specific applications. The header information set is much different from those of other image formats. TIFF can as well support more than one image compression methods by specifying them in dedicated tags.

You can convert a page of html to tiff with the assistance of tool VeryPDF HTML Converter Command Line. The commands for the conversion in the MS-DOS command prompt window are:

D:\htmltools\htmltools.exe D:\htmltools\Verypdf.html D:\htmltools\Verypdf.tiff <Enter>.

“D:\htmltools\htmltools.exe” in the command lines is indicating the path and name of the executable tool component, “D:\htmltools\Verypdf.html” is the name of the source html document and “D:\htmltools\Verypdf.tiff” specifies the output file path, name and target format for the conversion from html to tiff.

The status of the conversion is as shown in the following screen snapshot.

image

The other screen snapshot shows the image converted from html to tiff.

image

The width and height of the converted image are 800 and 776 pixels, which are dependent on the original html document. The default resolution for conversion html to tiff using VeryPDF HTML Converter Command Line is 96 dpi for this case in Windows XP Operating System.

VN:F [1.9.20_1166]
Rating: 0.0/10 (0 votes cast)
VN:F [1.9.20_1166]
Rating: 0 (from 0 votes)
html converter (htmltools)

How to make a thumbnail for html document?

Downloading larger images and displaying them with web browsers always require higher bandwidths and longer time, and images in larger sizes are sometimes troublesome for being arrayed into one space-limited single html page. So, if you are running a WWW server and need to present images to your clients, you may need to generate thumbnails for your large size images. If you want to let your web users preview the linked pages before they open them, you must want to create thumbnails for your html pages. Here will come a helpful tool of making thumbnails for your html pages.

There are two stages for VeryPDF HTML Converter Command Line to generate a thumbnail for html. The first stage is converting your page of html to emf image and the second one is converting the emf image to a small size picture. The thumbnail can be stored in jpg, png or gif format. Here is an example for generating a thumbnail for html and being stored in jpg format.

Below are the commands to type into you MS-DOS command prompt window:

Line 1: D:\htmltools\htmltools.exe D:\htmltools\Verypdf.html D:\htmltools\Verypdf.emf <Enter>
Line 2: D:\htmltools\htmltools.exe -width 256 D:\htmltools\Verypdf.emf D:\htmltools\Verypdf.jpg <Enter>

In command Line 1, “D:\htmltools\htmltools.exe” calls the conversion tool, “D:\htmltools\Verypdf.html” indicates the path and name of the source html page, and “D:\htmltools\Verypdf.emf” specifies the output file path, name and target format for the conversion from html to emf. Performing Line 1 converts the page of html to emf image.

In command Line 2, “D:\htmltools\htmltools.exe” is as the same with that in Line 1, “D:\htmltools\Verypdf.emf” is the name of the emf image converted using Line 1, and “D:\htmltools\Verypdf.jpg” is the name for the thumbnail image stored in jpg format. The option string “-width” is optional and for setting the width (256 pixels for this case) of the created thumbnail. Line 2 realizes generating a thumbnail for html from the converted emf image.

All the information and status of the two conversion stages are presented in the screen snapshot as below:

image

The generated thumbnail image of width 256 pixels is under the nether:

Verypdf

Here are another two examples for creating thumbnails stored in png and gif, respectively.

1, creating png thumbnail for html:

D:\htmltools\htmltools.exe D:\htmltools\Verypdf.html D:\htmltools\Verypdf.emf <Enter>
D:\htmltools\htmltools.exe -width 256 D:\htmltools\Verypdf.emf D:\htmltools\Verypdf.png<Enter>

2, creating gif thumbnail for html:

D:\htmltools\htmltools.exe D:\htmltools\Verypdf.html D:\htmltools\Verypdf.emf <Enter>
D:\htmltools\htmltools.exe -width 256 D:\htmltools\Verypdf.emf D:\htmltools\Verypdf.gif<Enter>

In the process, you can use your preferred width by changing the argument number “256”.

VN:F [1.9.20_1166]
Rating: 0.0/10 (0 votes cast)
VN:F [1.9.20_1166]
Rating: 0 (from 0 votes)
docprint pro

How to convert PowerPoint to Postscript?

You can use  various ways to convert PowerPoint to Postscript (hereinafter we call PPT to PS). Here I would like to share two methods with you. If you know any other more convenient method, please tell me.

Method 1

Step 1: open the PPT file you want to convert to PS

Step 2: press Ctrl+P

Step 3: select  docPrint PDF Driver on the drop-down menu on the right of “Open”>>press “OK”

Step 4 : select a directory , and  select the format type to “Postscript File (*.PS) ”

image

Don’t forget to click "Save”.

Method 2

Step 1:run VeryPDF docPrint Pro, which is an all-to-all converter

image

Step 2: set the output format to “.ps”

             click on “setting”>>select the “output format” to “.ps”>>press “OK”

Step 3: add the PPT file to the list box

            You can drag the PPT to the list box or input it by clicking on “Add File(s)”.

Step 4: click on “Start” to start converting PPT to PS. You also have to select the PS in your computer by selecting the directory after you click on “Start”.

VN:F [1.9.20_1166]
Rating: 0.0/10 (0 votes cast)
VN:F [1.9.20_1166]
Rating: +1 (from 1 vote)