pdf editor

How always to appear the beginning figure of the textbox when add it to pdf file?

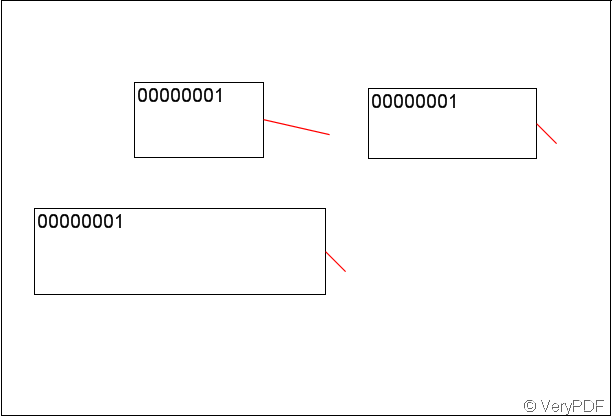
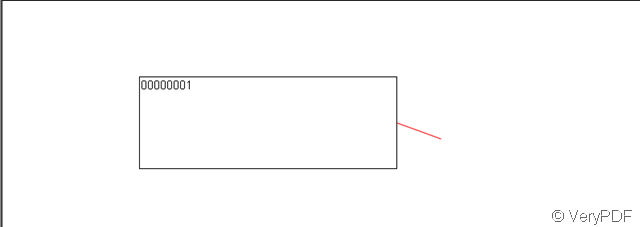
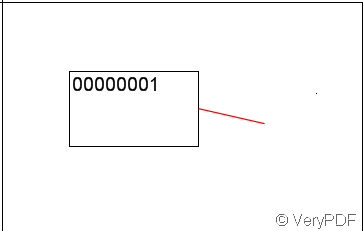
When we add a textbox to pdf file by use of “verypdf pdf editor”, as default it displays No. 00000001, then from which is No. 00000002 and go on endlessly. Do you know how to make it always begin from No.00000001? Here I tell you.

First method, restart  “verypdf pdf editor”, it’s a quitter’s mode and maybe affect other content that have finished.

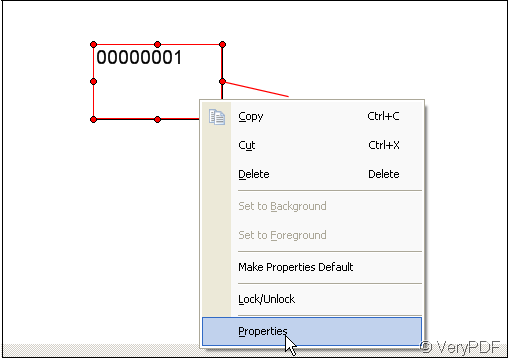
Second method, after adding a textbox to pdf for the first time, put your cursor on the textbox then click the right button of the mouse and choose the “Properties” option . Look at the illustration below:

image   

image

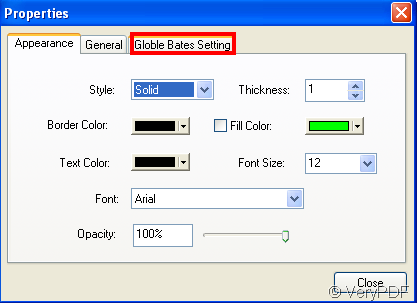
After that choose “Globle bates setting” and click “reset” , look at the illustration below:

image 

image

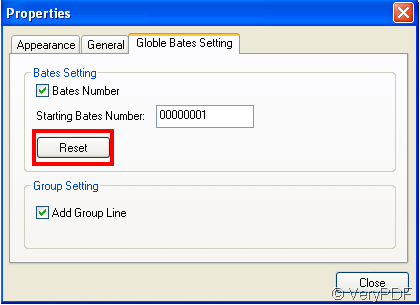
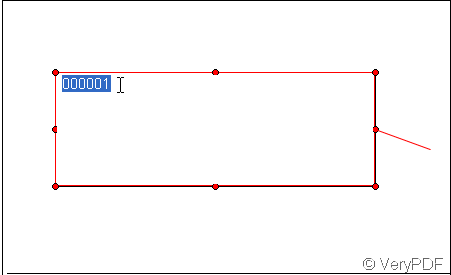
Thus the beginning figure will appear when you add a textbox next time, repeat the operation the textbox you add is always from No. 00000001. Look at the sample below:

image

VN:F [1.9.20_1166]
Rating: 0.0/10 (0 votes cast)
VN:F [1.9.20_1166]
Rating: 0 (from 0 votes)
docprint pro

How to convert OpenOffice to TIFF image

TIFF(Tagged Image File Format),  a file format for storing images, is popular among graphic artists, the publishing industry, and both amateur and professional photographers in general.It was originally created by the company Aldus for use with what was then called "desktop publishing". TIFF  is widely supported by image-manipulation applications, by publishing and page layout applications, by various applications like scanning, faxing, and word processing.

As an all-to-all document converter, VeryPDF docPrint Pro can convert almost any document to any image like convert files from OpenOffice to TIFF, PDF to EPS, and Word to PNG .  This article would like to show you how to convert  OpenOffice to TIFF in the MS-DOS command mode via docPrint Pro.

Step 1: run MS-DOS

Click “Start” on the left-down corner of the screen>click “Run” on the menu>enter “cmd” and click “OK” to open the MS-DOS command prompt window as illustrated below:

image

Figure1. the initial MS-DOS command prompt window

Step 2: Type the following command into the command prompt window to convert OpenOffice to TIFF.

  • C:\Documents and Settings\admin>“C:\Program Files\docPrint Pro v5.0\doc2pdf.exe” –i “C:\Document and Settings\admin\Desktop\verypdf.odt” –o “C:\Document and Settings\admin\Desktop\verypdf.tiff”

In the lines,

  • “C:\Program Files\docPrint Pro v5.0\doc2pdf.exe”

refers to the executable tool of docPrint Pro;

  • –i “C:\Document and Settings\admin\Desktop\verypdf.odt”

indicates the source document;  and

  • –o “C:\Document and Settings\admin\Desktop\verypdf.tiff”

represents the target directory and the outputting TIFF image.

The following screenshot illustrates the MS-DOS command prompt window after you type the command.

image

Figure 2. with the command for converting OpenOffice to TIFF

Step 3: Hit Enter key on the  keyboard to start converting files of OpenOffice to TIFF.  Then, the command prompt window as illustrated below will present the processing status. 

image 

Figure 3. with processing status

The following screenshot represents the effect of the conversion from OpenOffice to TIFF.image

Figure 4. the TIFF image

VN:F [1.9.20_1166]
Rating: 0.0/10 (0 votes cast)
VN:F [1.9.20_1166]
Rating: 0 (from 0 votes)
pdf editor

How to add a textbox to pdf file by use of verypdf pdf editor?

There are two icons whose appearance is the same, one is contained in “Edit Comment”, the other is in “Edit Content”, the way to distinguish them depend on their title, the icon in “Edit Comment” whose title is “add textbox”, the other icon in “Edit Content” whose title is “add text”, here I introduce how to add a textbox to pdf file.

First click the icon “Edit Comment”, afterwards the relevant icons will be lighted, select the icon “T+” and click and then slide your mouse in the space of pdf file to build a textbox, in the textbox you can edit content, you can set the color of the textbox and so on, the method that click the right button of your mouse after having clicked the textbox which you have built and choose “properties”. Now suppose I need add a textbox and in which I need input “www.verypdf.com”,  Look at the illustration below:

Step 1: find the icon “T+”

image

Step 2: build a textbox in pdf file

image

Step 3: delete the existing content, the method is that double click the left button of your mouse in the textbox then cover the existing content and press “Delete” key .

image

Step 4: input “www.verypdf.com” then click a blank place where is beyond the textbox or click the “View” icon in the toolbar. That’s all.

image

VN:F [1.9.20_1166]
Rating: 0.0/10 (0 votes cast)
VN:F [1.9.20_1166]
Rating: 0 (from 0 votes)
pdfcamp printer

How to convert Google Docs to PDF file?

Google Docs is a free, Web-based office suite, and data storage service offered by Google. It allows users to create and edit documents online while collaborating in real-time with other users. You can create new documents from scratch or upload existing documents, spreadsheets and presentations. There's no software to download, and all your work is stored safely online and can be accessed from any computer.There are many advantages of google docs,such as creating basic documents from scratch or starting from a template,Uploading your existing files,Choosing who can access your documents,Sharing instantly,Editing and presenting with others in real time,etc.But at first,you should have a google account,if not,you have to register one and sign in.

If you want to convert the google docs to pdf file, I think you should use the software PDFcamp Printer and I will tell you several steps which is easy enough to learn.

Step1.Sign in google docs and you can create a new file or upload the existing documents in your computer.Of course you can set the font color,font number and other parameter in google docs.

image

Step2.After finishing your document,you can click “file”—“print” or press “Ctrl”+”P”to convert the google docs to pdf file.There are two methods to convert google docs to pdf file.

(1)Click “file”—“print”on the browser and select the printer,then set the parameter in “properties”.There are nine kinds of parameter you can set in properties and you can set freely according to your need.Then name and save the new pdf file.

image

(2)Because of the powerful function of google docs itself,you can create the pdf file directly by selecting the open format.The default open format is Adobe Reader.Then you can click “OK”.

image

The system will download the new pdf file itself and you will see the file after download.

image

In the conversion of google docs to pdf,these two ways are very practical,you can choose anyone to use.

VN:F [1.9.20_1166]
Rating: 4.7/10 (28 votes cast)
VN:F [1.9.20_1166]
Rating: +1 (from 7 votes)
docprint pro

How to convert OpenOffice to EPS?

EPS or Encapsulated PostScript is a standard graphics file format for exchanging images, drawings (such as a logo or map) or even layouts of complete pages. An EPS file internally contains a  description of such an object or layout using the  PostScript page description language. It can include both bitmap and vector data.  The purpose of an EPS file is to be included in other pages. Sometimes EPS files are called EPSF files.  EPS files have the extension .eps or .epsf. EPS files are more or less self-contained, reasonably predictable PostScript documents that describe an image or drawing and can be placed within another PostScript document.

One of the quickest ways to convert OpenOffice to EPS  is to use a document converter. This article will take VeryPDF docPrint Pro for instance to show you how to convert a file of OpenOffice to EPS image.

Step 1: Run VeryPDF docPrint Pro

Step 2: Drag the file you want to convert from OpenOffice to EPS image to the list box of the application.

Step 3: Set the output format to EPS

After click the second button “Setting” near the bottom of the application panel, select the output format to “.eps” on the drop-down menu next to “Output Format” in the prompt box.  And click “OK” to finish setting.

Step 4: Start converting  OpenOffice to EPS

After you click the third button on the panel of docPrint,  a box will pop out to navigate you to select a directory to save the file converted from OpenOffice to EPS.  You should type a name in to the edit box next to “File Name” and click “”Save” to start converting the file from OpenOffice to EPS.

While it is processing, an icon looks like a printer will appear in the status bar on the right-down corner of the screen. When this icon disappears, it means the conversion is finished, and the image converted from  OpenOffice to EPS opens by default. The following screenshot illustrates the effect of the image from OpenOffice to EPS.

 image

VN:F [1.9.20_1166]
Rating: 0.0/10 (0 votes cast)
VN:F [1.9.20_1166]
Rating: 0 (from 0 votes)