pdfcamp printer

How do I print background color and images from IE to PDF?

When you search for something on the browser such as IE9,you may find the information on it is very useful to you and you may want to save the whole page as a pdf file for the words,images,maybe the background color.So you will need the help of PDFcamp Printer to print html to pdf file.

You may do the same thing just like followings.

1.Open the webpage and press “file”—“print”.

2.Choose the printer PDFcamp Printer and set the parameter of the printer.

3.Save the pdf file and name it.

After that,you will find the new resulted file is a black-and-white pdf file without any background color and images.

image

                                                    the original page

image

                    the resulted pdf file(without background color and images)

How to resolve this problem?You can control it like this.

1.Open a webpage at Internet Explorer 8.

2.Click “tools”—“Internet Options”then click “Advanced”.

image

3.In settings groupbox,you should find printing and check “print background color and images”.Then click “OK”

image

Click “file”—“page setup” and check “Print Background Colors and Images”,then click “OK”.

image

4.Press “Ctrl”+”--P”or click “file”—“print” and select your printer as PDFcamp Printer.Set the parameter in preferences.

image

5.Name and save the file in the location you like.Then you will see the new pdf file with background color and images.

VN:F [1.9.20_1166]
Rating: 0.0/10 (0 votes cast)
VN:F [1.9.20_1166]
Rating: 0 (from 0 votes)
docprint pro

How to convert OpenOffice to PDF file?

There are various methods to convert OpenOffice to PDF file. This article  would like to introduce one method  to convert OpenOffice to PDF. But before start you may need to make sure there is a document converter or a printer driver application in your computer. Assuming you have installed VeryPDF docPrint Pro, you can do as follows:

Method 1 via VeryPDF docPrint Pro

Step 1: launch MS-DOS

click “start”>”run”>type “cmd” in the run dialog

Step 2 : Drag the “word2pdf.exe” to the DOS window

To  find this executable file you can right-click the icon of  VeryPDF docPrint Pr on the “Start” menu>click “properties”>click “find target”.

Step 3: Click the DOS window >hit Space on the keyboard > type  “-i” > drag the file you want to convert from OpenOffice to PDF to the DOS window

Here  “-i” means input, and the command line following“-i”refers to the source document

Step 4: Click the DOS window >hit Space on the keyboard > type “–o” > hit Space on the keyboard > drag the file you want to convert from OpenOffice to PDF to the DOS window again and change the extension name from “odt” to “pdf”

Here “-o” means output, and the command line following “-o” directs to the outputting file.

Step 5 : Hit Enter to start converting. You can view the effect of the file of OpenOffice to PDF as following:

image

VN:F [1.9.20_1166]
Rating: 0.0/10 (0 votes cast)
VN:F [1.9.20_1166]
Rating: 0 (from 0 votes)
docprint pro

How to convert OpenOffice to PCX image

PCX is an image file format originated with ZSoft's MS-DOS-based PC Paintbrush. Sometimes, PCX is referred to as the PC Paintbrush format. It is one of the most widely used storage formats. It was the native file format for Personal Computer eXchange Paintbrush and became one of the first widely accepted DOS imaging standards. PCX is used in Microsoft Windows and Windows-based products but has found wide acceptance mainly in the MS-DOS world. It is mainly an exchange and storage format.

This article would like to introduce two methods to convert  OpenOffice to PCX image.

Method 1

Convert a file of OpenOffice to PCX image via a document converter . Take VeryPDF docPrint Pro as an example:

Step1: Run VeryPDF docPrint Pro

Step 2: click “Add File(s)” , select “All Files(*.*)” in the combo box 0n the right of  “Files of type”. Otherwise, you can not find the source  OpenOffice document in the list box because the file extension “.odt” is not listed on the menu of “Files of type”.image

Then, select the file you want to convert from OpenOffice to PCX in the list box in the same dialog and click open to input it to the application.

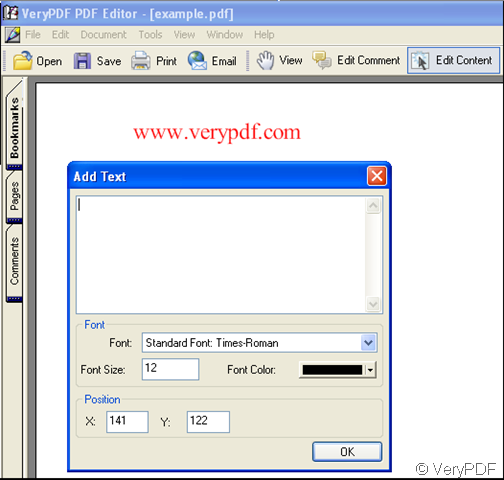
Step 3: Click “Setting” to  select “.pcx” as the output format in the dialog pops out.  Click “OK” to finish setting options.

Step Click “Start” to select a directory for saving and to start converting from OpenOffice to PCX .

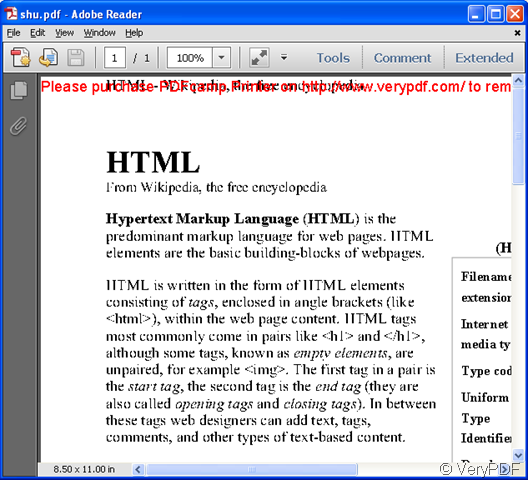
When the conversion is finished in seconds, you can view the effect of the PCX image as illustrated below:

image

Method 2

Convert OpenOffice to PCX via a printer like docPrint.

Step 1: Open the OpenOffice file

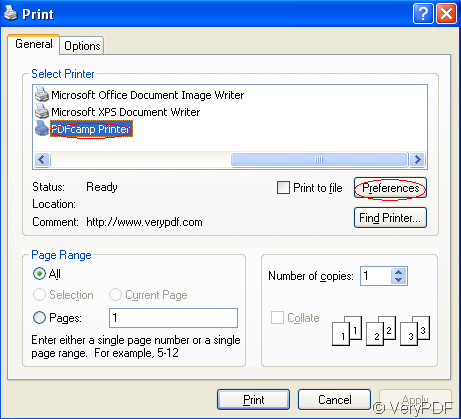
Step 2: Hit Ctrl and P at the same time on your keyboard to open a printer to convert OpenOffice to PCX.

Step 3: Select “docPrint”  in the combo box on the right of “Name” in the  Print dialog. Press “OK” .
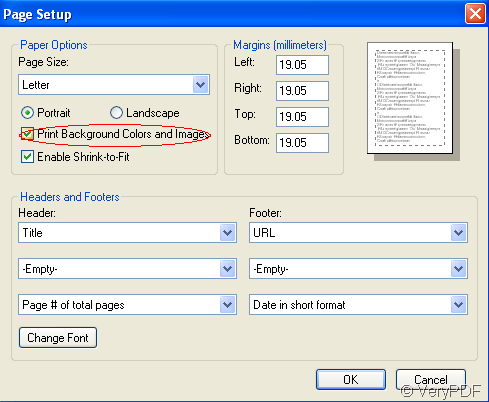
Step 4: Click the little button image on the left-up corner of the docPrint dialog. When the Save As dialog pops out, you should do as follows:

  • Select the directory you want save the pcx image in the combo box next to “Save in”.

image

  • Select “All file(*.*)” in the combo box on the right of “Save as type”. This is because the extension name “.pcx” is not listed on the drop-down menu of the combo box.

image

  • Type a file name with the file extension  “.pcx” in the edit box on the right of “File name”. For example, you can name the file converted from OpenOffice to PCX as “docprint1.pcx” here. Then, click “Save”.

image

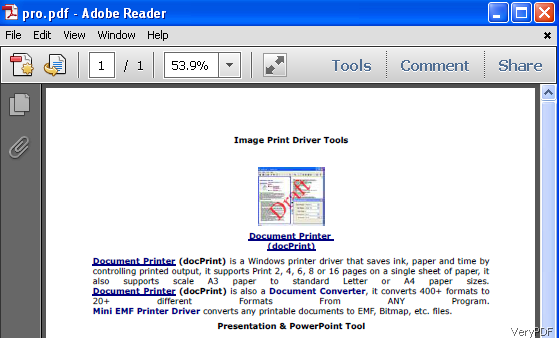
The conversion from OpenOffice to PCX will finish in seconds. The following screenshot shows the  effect of the conversion from OpenOffice to PCX image :

image

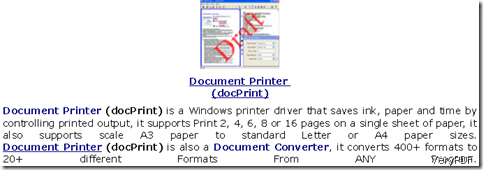
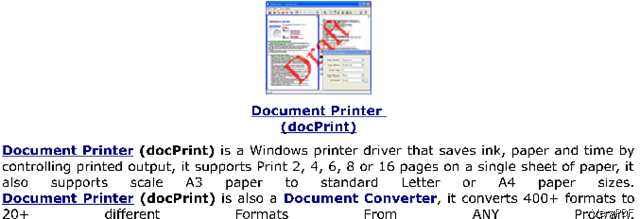
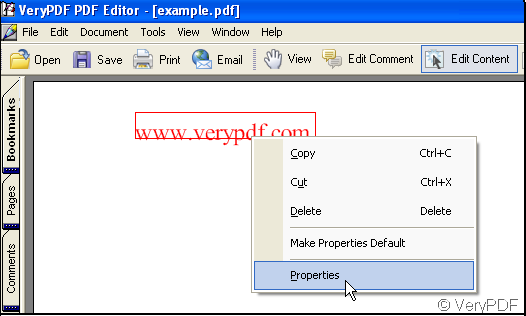
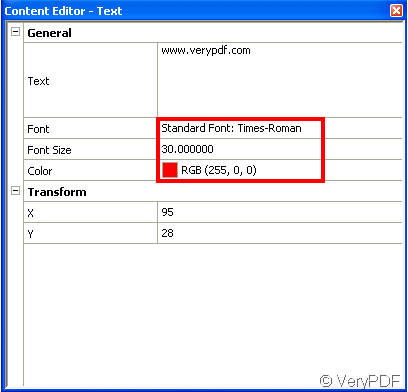
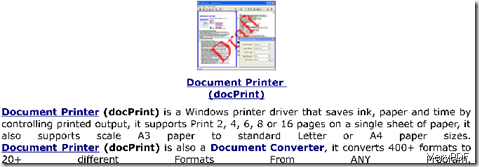
Now let’s enlarge the images for four times to see the effect of the words.

image

image

The first one which is a vector image is created by the all-to-all document converter docPrint Pro; while the second one which is a raster PCX  is created by the printer docPrint.

VN:F [1.9.20_1166]
Rating: 0.0/10 (0 votes cast)
VN:F [1.9.20_1166]
Rating: 0 (from 0 votes)
pdf editor

How to set the font size and something that related to the font in a pdf file?

In the menu of “verypdf pdf editor” click “Edit Content” icon at the same time there are two icons enabled, of which click the first icon “T+”, by then the cursor changes into a holding hand, drag it in the space of pdf file and click the left button of your mouse, a window pops. Look at the illustration below:

image

image

In the window you can set the font, font size and font color, you can set it before your typing in the “Add Text” of the window, you can also set it after your typing in the “Add Text” of the window. Here I introduce another way to set the font and to which something related.

When you have edited some content in a pdf file,  click the “Edit Content” in the menu of “verypdf pdf editor”, then click the content you have edited in the pdf file and once again click the right button of your mouse, choose “Properties” option. Look at the illustration below:

image

When you click the “Properties” a new window pops:

image

You can modify the font in the area marked by a red rectangle, after your modification click the left button of your mouse, it’s OK.

VN:F [1.9.20_1166]
Rating: 0.0/10 (0 votes cast)
VN:F [1.9.20_1166]
Rating: 0 (from 0 votes)
pdfcamp printer

How to print an EPS file to PDF file?

Encapsulated PostScript, or EPS, is a DSC-conforming PostScript document with additional restrictions which is intended to be usable as a graphics file format. In other words, EPS files are more or less self-contained, reasonably predictable PostScript documents that describe an image or drawing and can be placed within another PostScript document. An EPS file internally contains a  description of such an object or layout using the  PostScript page description language. It can include both bitmap and vector data.  The purpose of an EPS file is to be included in other pages. Sometimes EPS files are called EPSF files.

Now if you have an eps file,and you want to print it to pdf file,how to do without any obstacles?PDFcamp Printer will do this for you,which is easy enough to learn and master.

Step1.You should open your eps file which is needed printing from eps to pdf file.

image

Step2.Click “File”—“print”or use the hot key”Ctrl”+”P” to start the conversion.Then you will see a popup window in which you should choose the right printer,of course,PDFcamp Printer should be selected.In properties,you can set the parameter of PDFcamp Printer to meet your needs.

image

Step3.After clicking “Ok”in PDFcamp Printer properties and “OK”in print,you can save and name the new pdf file.Then you can see the resulted pdf file through printing eps to pdf file.

image

VN:F [1.9.20_1166]
Rating: 0.0/10 (0 votes cast)
VN:F [1.9.20_1166]
Rating: 0 (from 0 votes)