Today I am going to explain how to print docx to tif by using the docPrint Document Converter Professional. It has a virtual printer: the docPrint PDF Driver. So click this link: https://www.verypdf.com/artprint/docprint_pro_setup.exe and download it, then install it in your computer for the future use.
There are three pictures I put here to show you how to print docx to tif.
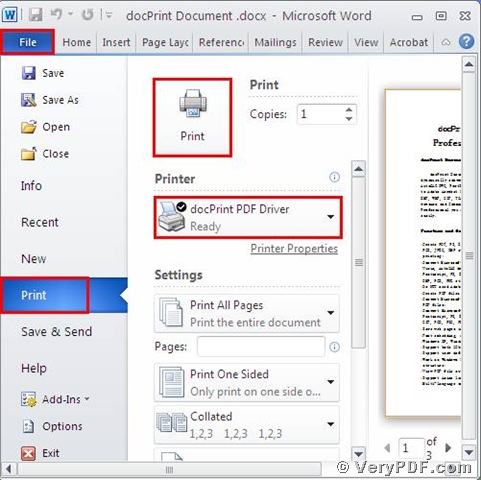
(Picture 1)
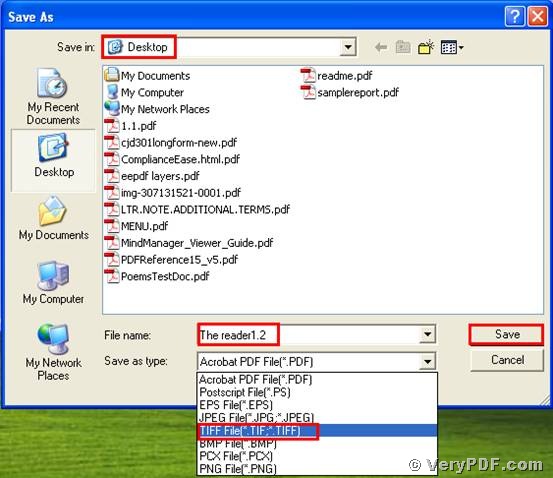
(Picture 2)
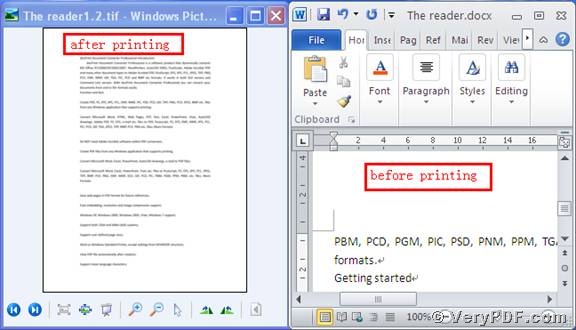
(Picture 3)
The first dialogue box (picture 1):
- Open a docx file; click “File”;
- Find “print”, click it. You can also use hot key “ctrl+p”
- Choose “docPrint PDF Driver”, click “print”.
The second dialogue box(picture 2):
- After you click “print”, it will popup the dialogue box “Save As”
- Choose the save location
- Input file name
- Select the file type “TIF”
- Save the change.
The third dialogue box(picture 3):
- Open the target file and the before printing file
- Compare them
- Find the effect
You will vividly find that we had printed docx to tif by using the docPrint PDF Driver.
You see it is very easy to operate. I suggested that you experience it by yourself and enjoy it .By the way, there is a basic version of the docPrint Pro. It has the same functions as the docPrint PDF Driver. The price is inexpensive. Click this link: https://www.verypdf.com/order_docprint.html and you can purchase it. Thanks for your reading.